

🐴 Lovable Crash Course
A detailed walkthrough of its features with tips and tricks

5 months ago, I shared my impressions of Lovable 2.0 in an article. Similarly, 8 months ago, I wrote an article on V0.
But the field of AI tools has been evolving at a remarkable pace, with new updates emerging almost every month.
That’s why I decided it was time to take another look at Lovable’s core and advanced features in its latest version. Today, I’ll walk you through a comprehensive overview, along with some practical tips.
I’ll also highlight how some of these compare to similar tools like V0, so you can get a better sense of their strengths and differences.
Let’s get started.
The Core Features
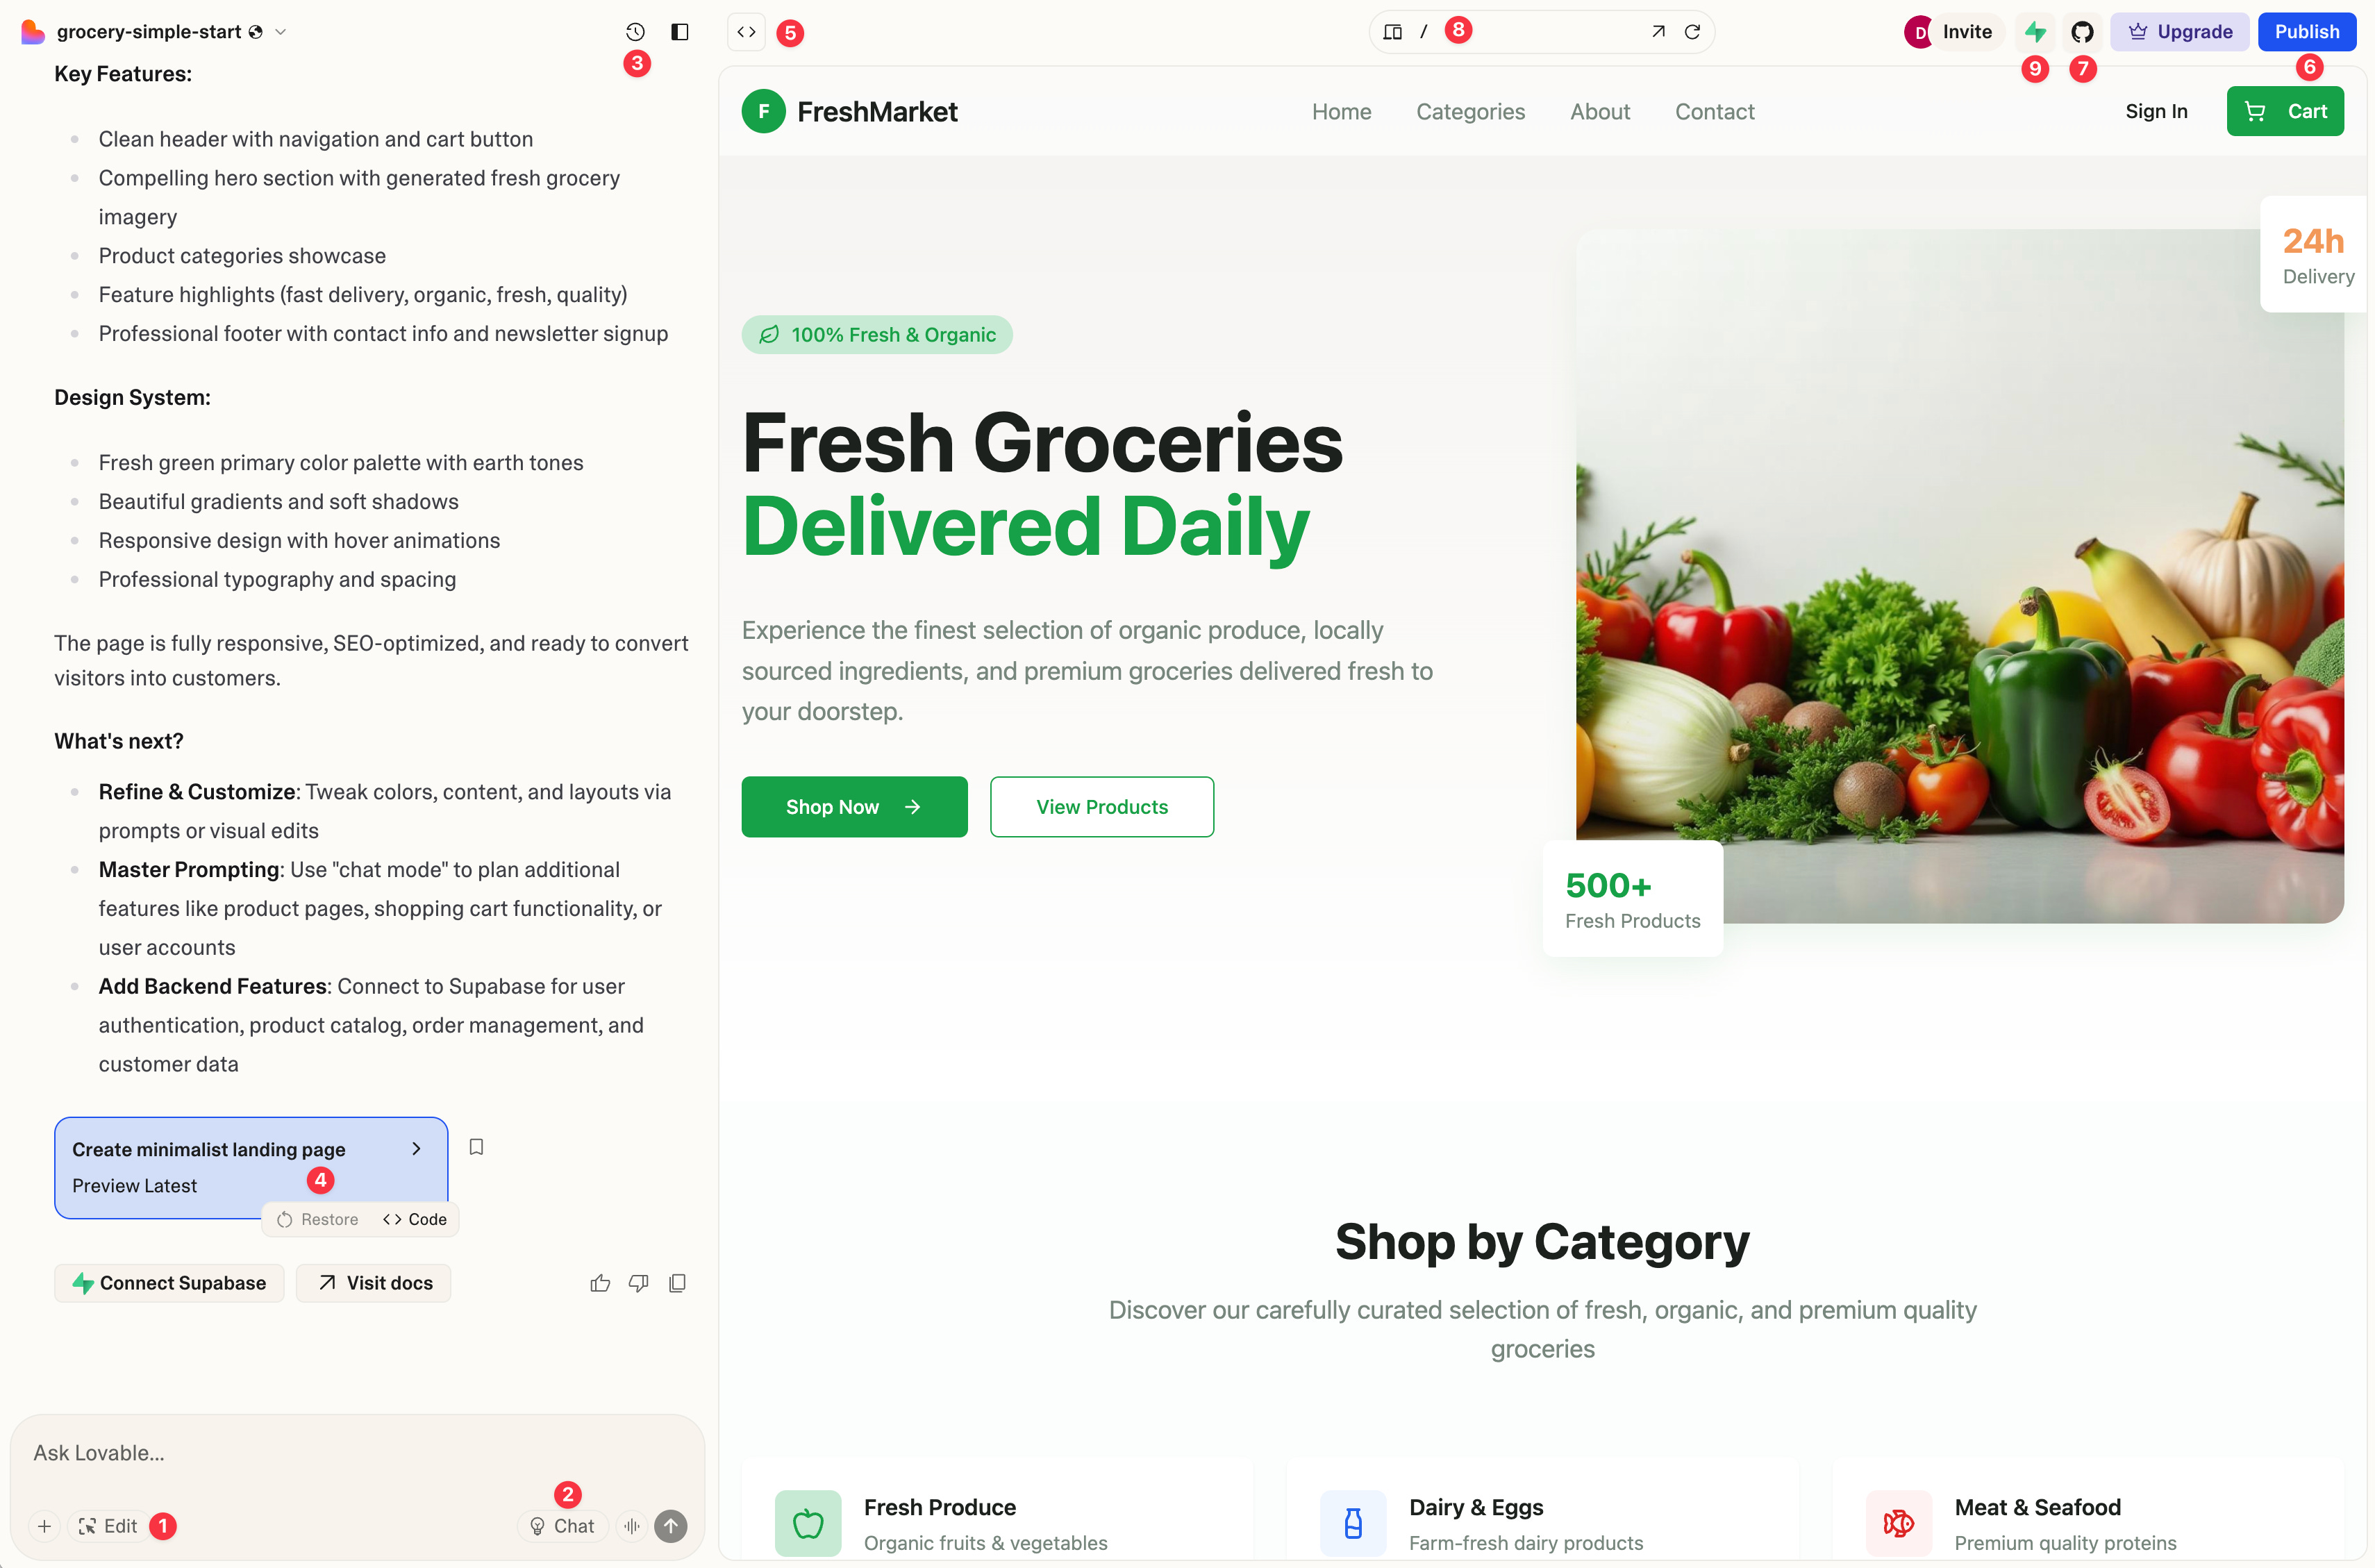
The red dots label the core features of Lovable.
I’ve roughly ranked the features based on how commonly they’re used, starting with the most popular ones.
1. Edit
“Edit” is a commonly used feature that allows you to select a div block and make simple adjustments, such as spacing and styling.
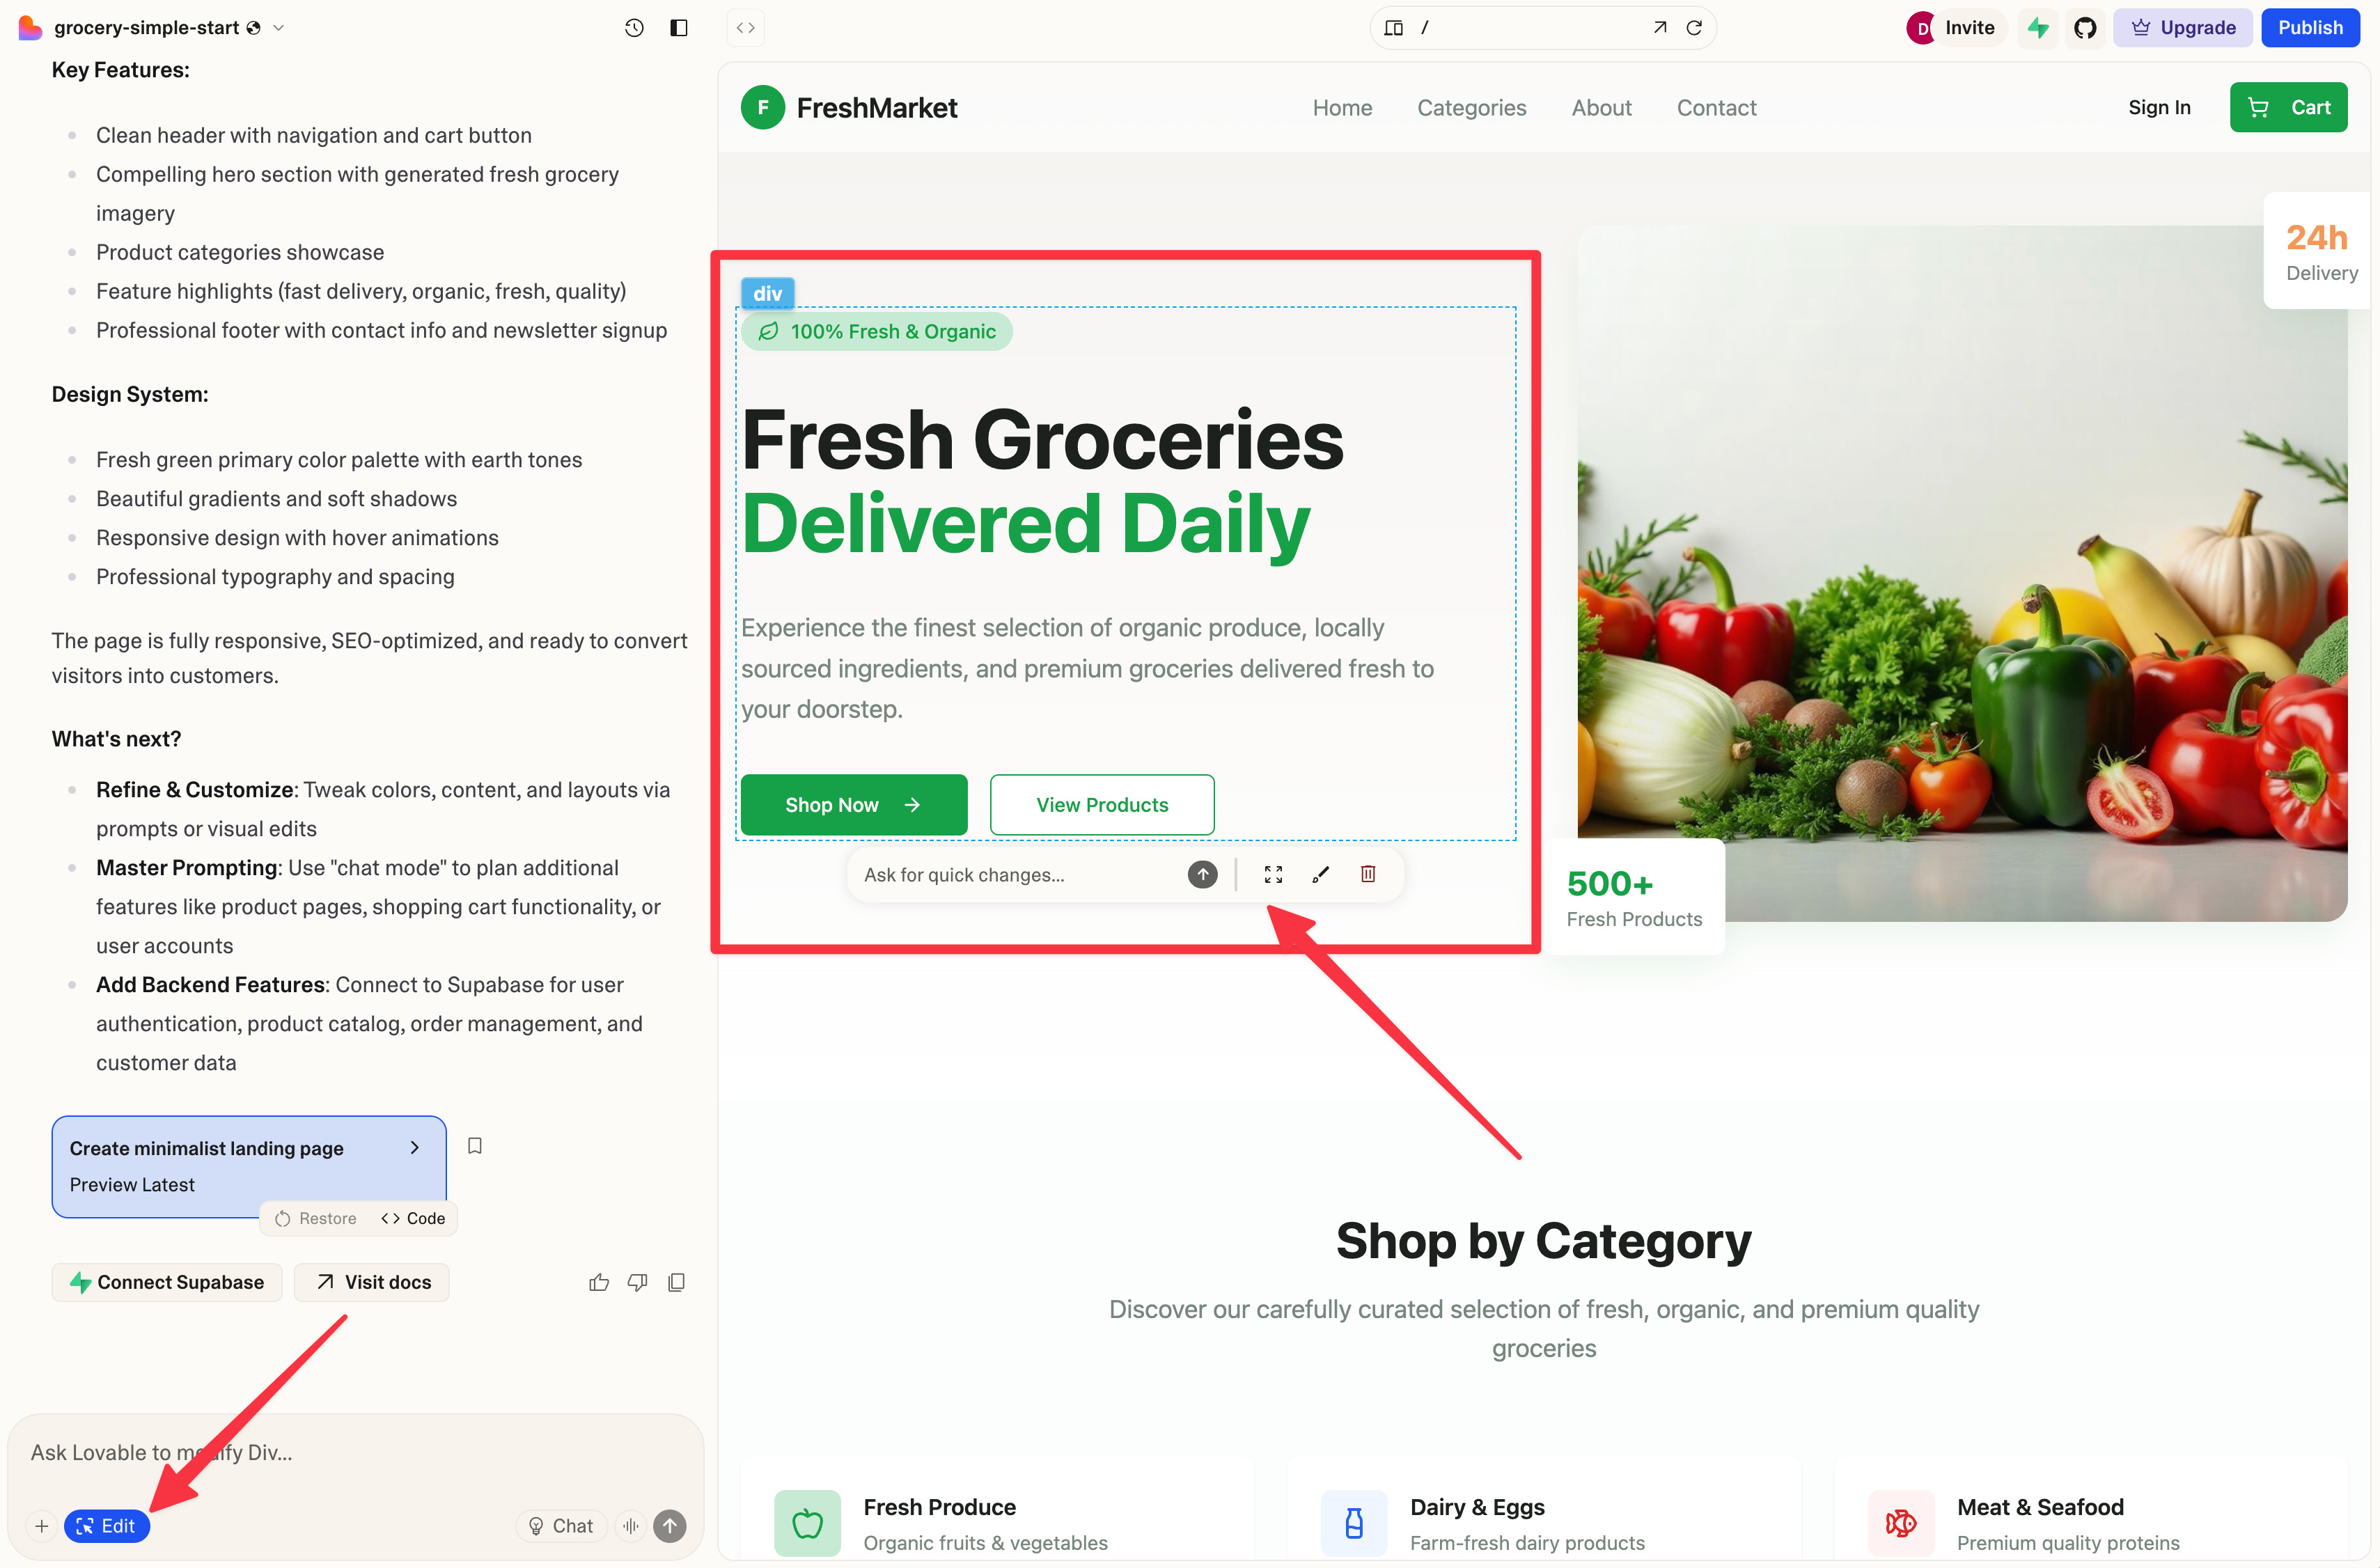
This feature is helpful because it lets you narrow down the context. Doing so is important not only because it helps you save tokens, but also because it leads to better results.
That said, Lovable’s “Edit” feature isn’t as intuitive or robust as V0’s, from the perspective as a product designer.
2. Chat
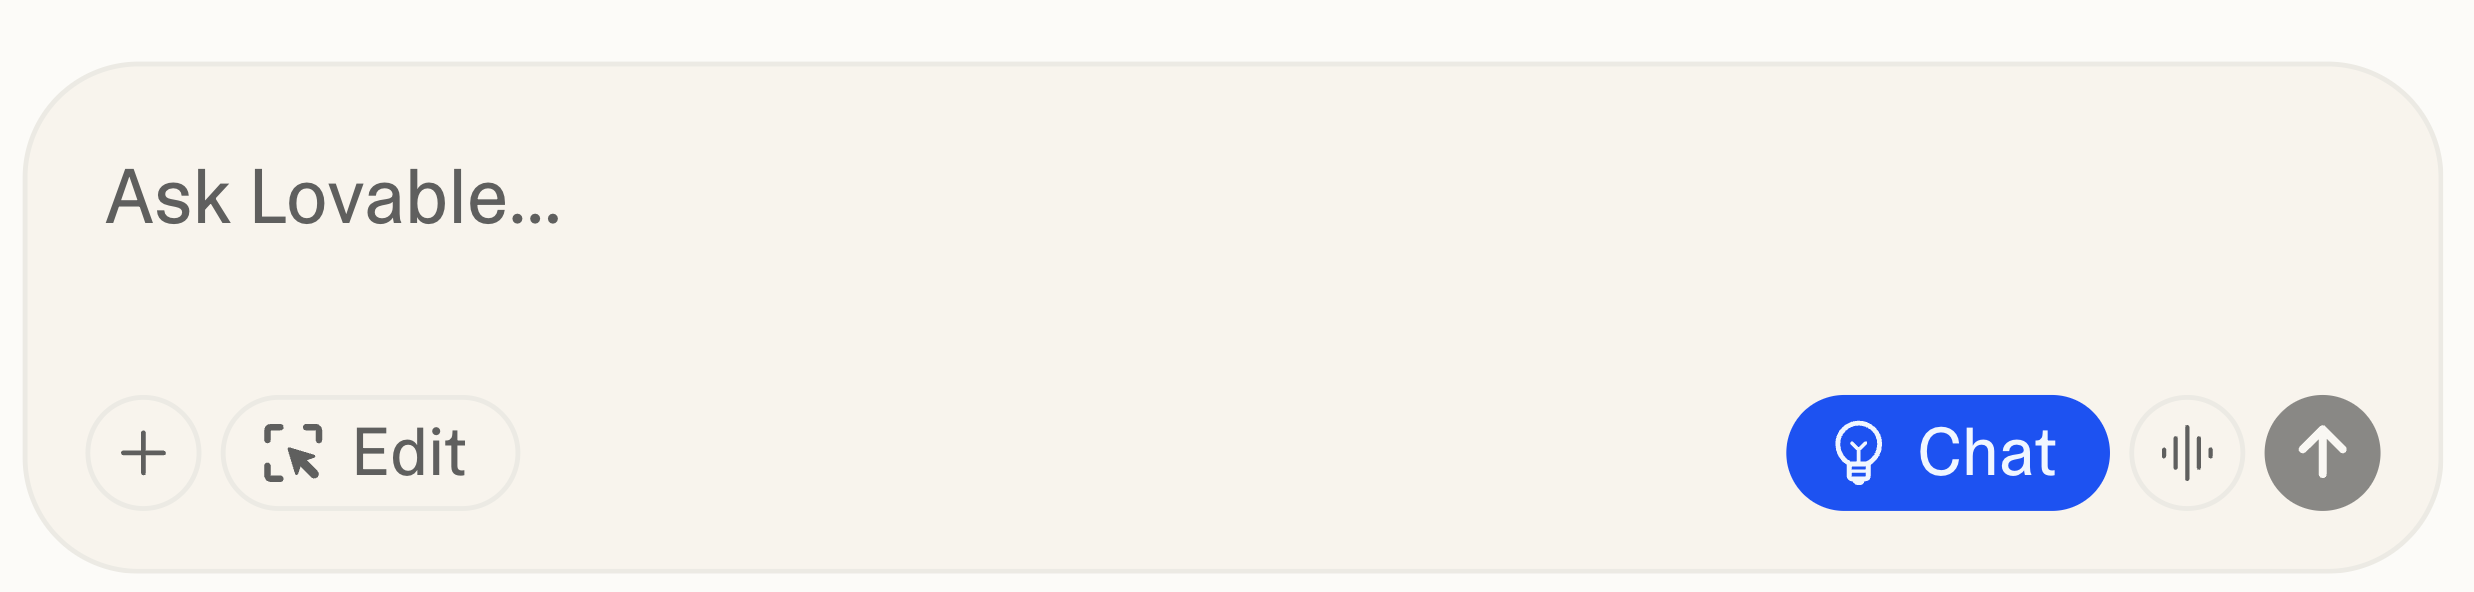
When you click “Chat” in the prompt window, it switches from the default “Agent Mode” to “Chat Mode.”
AI tools like Cursor, Replit, and even Magic Patterns have a similar feature, just named differently.
When you request help with implementing a feature or troubleshooting an issue, Chat Mode generates a clear, step-by-step plan in the prompt window. You’ll then see an “Implement the plan” button.
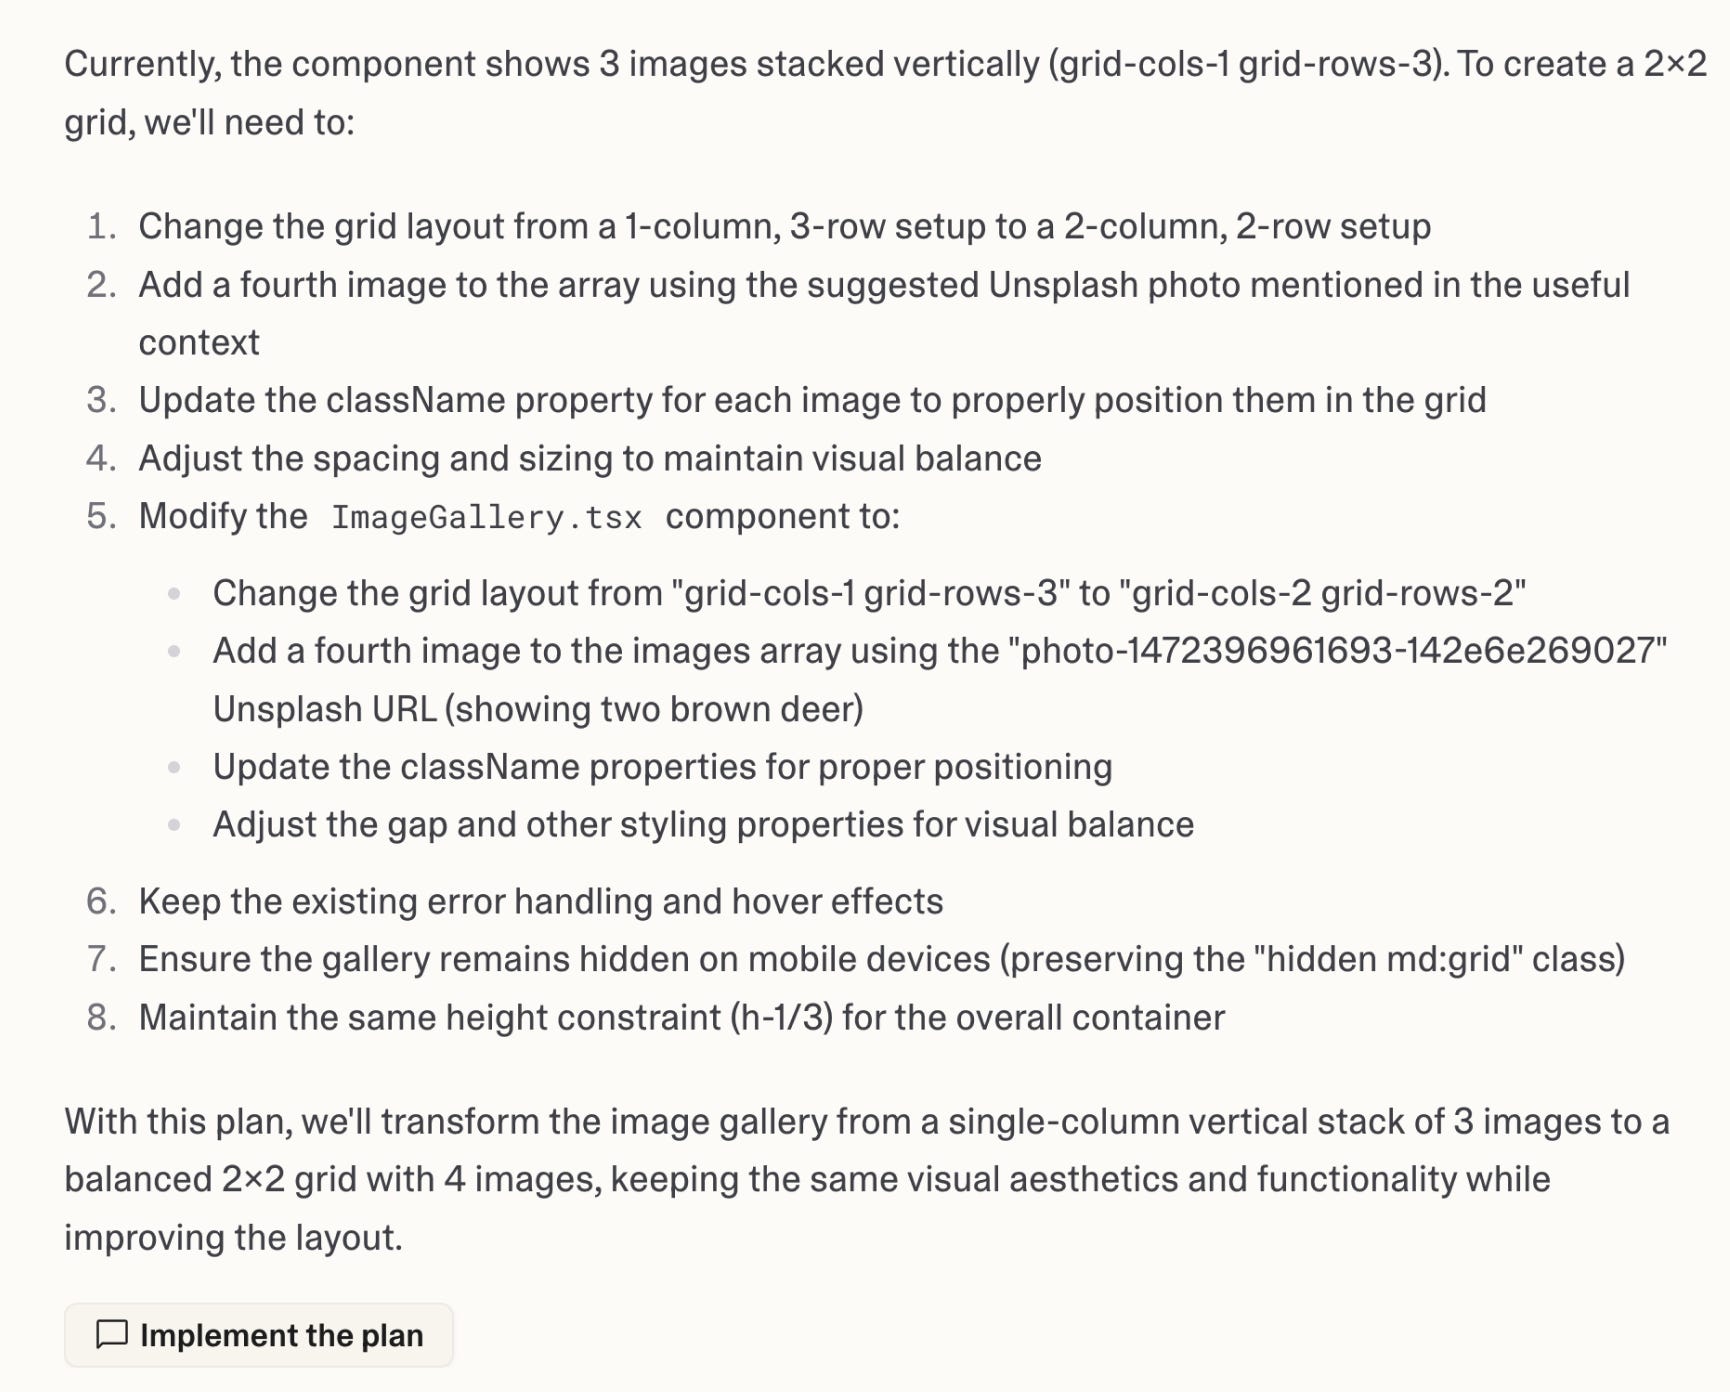
If you click the button, AI will switch to Agent mode automatically to apply the required code changes automatically.
It is helpful when you want to ask AI to investigate, debug, plan your project, without wanting it to edit the code yet.
It can also save you tokens, when you want to evaluate first before implementing.
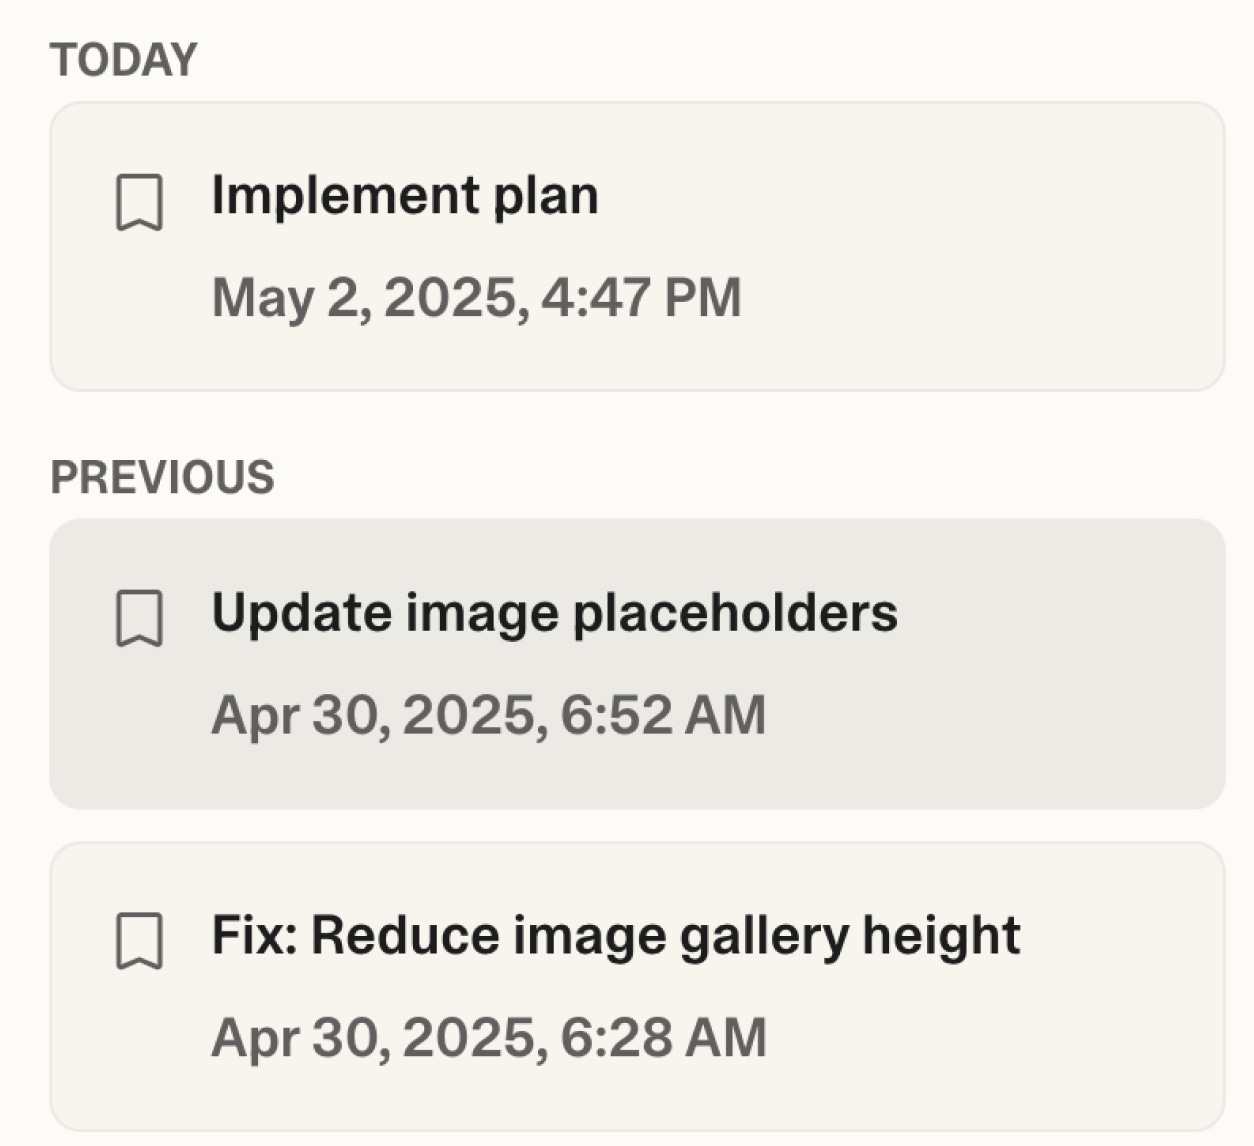
3. History
If you click the clock icon, it opens the history panel. Click it again to close the panel.

It is essentially a version control system. It is helpful because you can view and restore to any of the versions. For example:
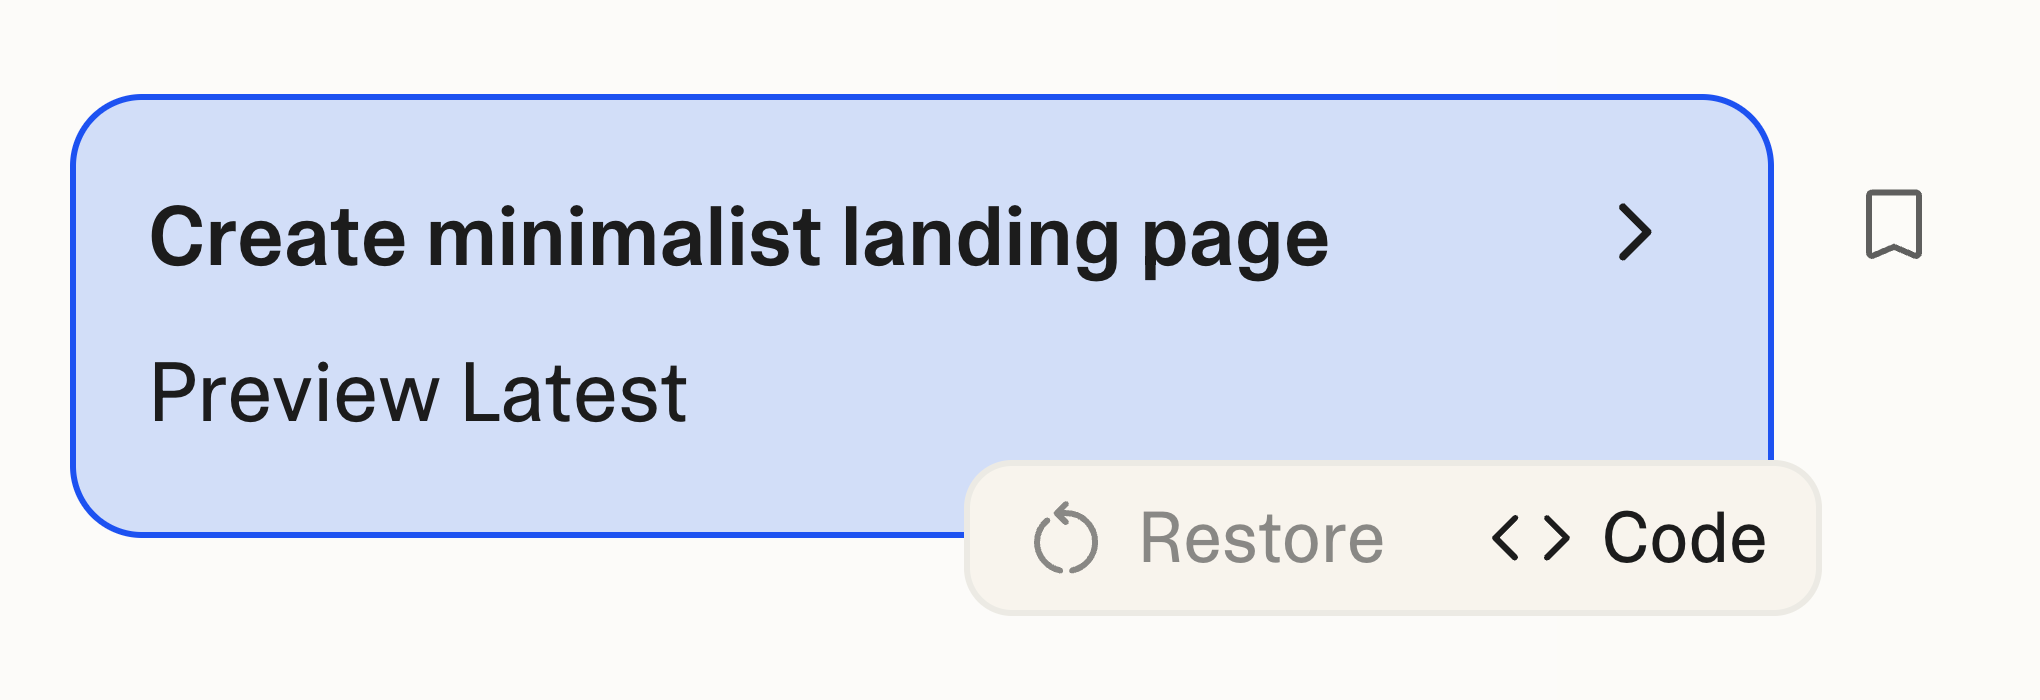
4. The In-line Widget
In the chat window, a widget appears each time you make a change.
You can view that version, revert to it, view its code, or even bookmark it.
By the way, the bookmark icon simply highlights that version in the history panel. This is useful when you’ve made many changes and want to keep track of the important ones.
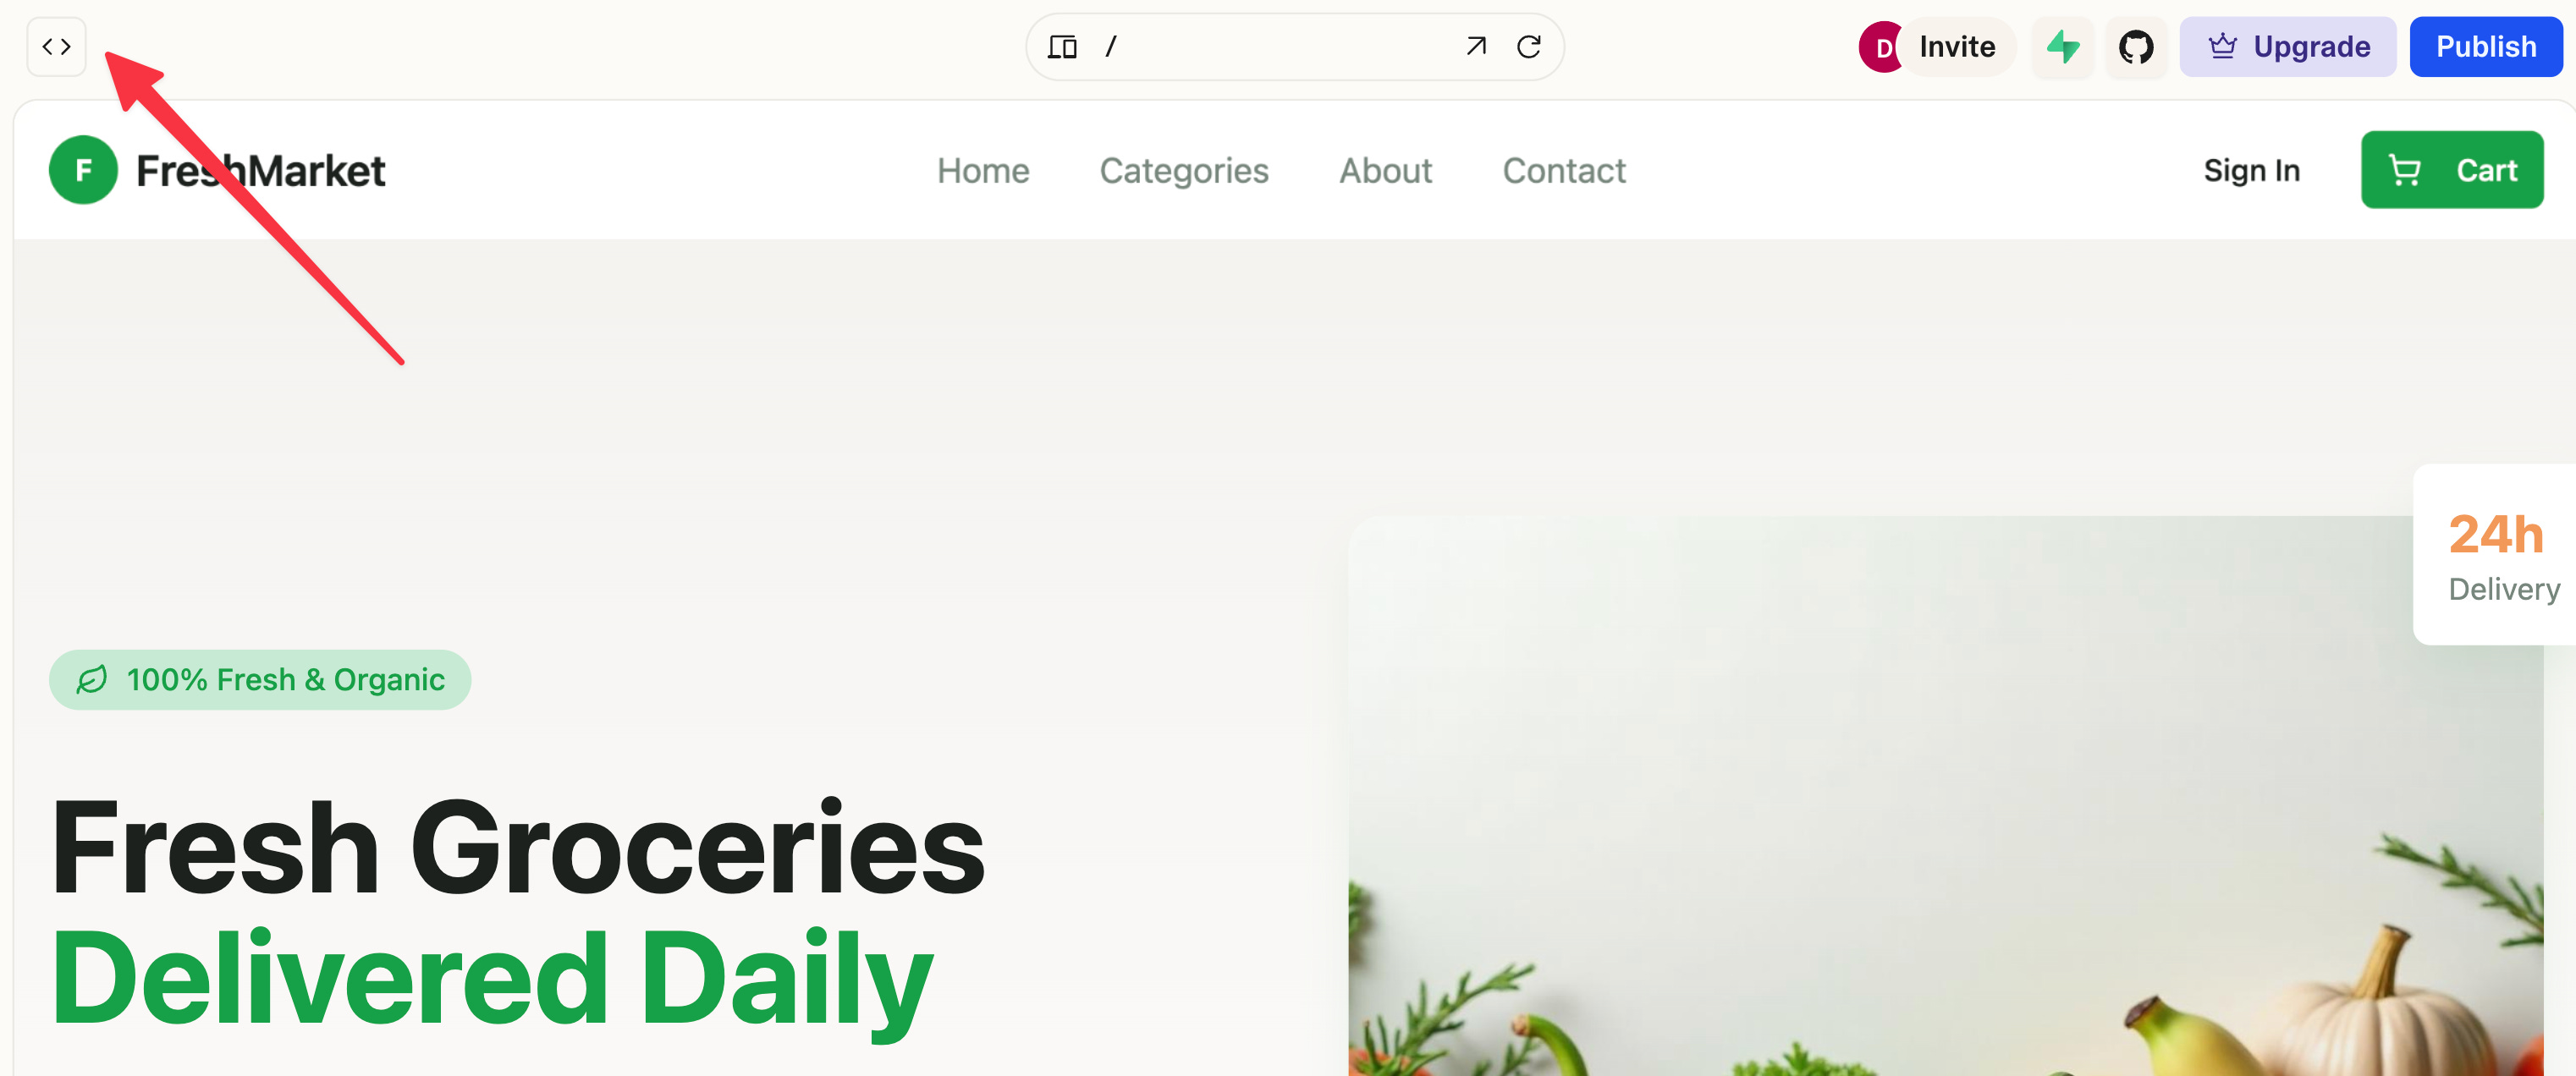
5. View Code
Click the code block icon to view the project’s file directory and full code.
Click it again to exit the code mode.
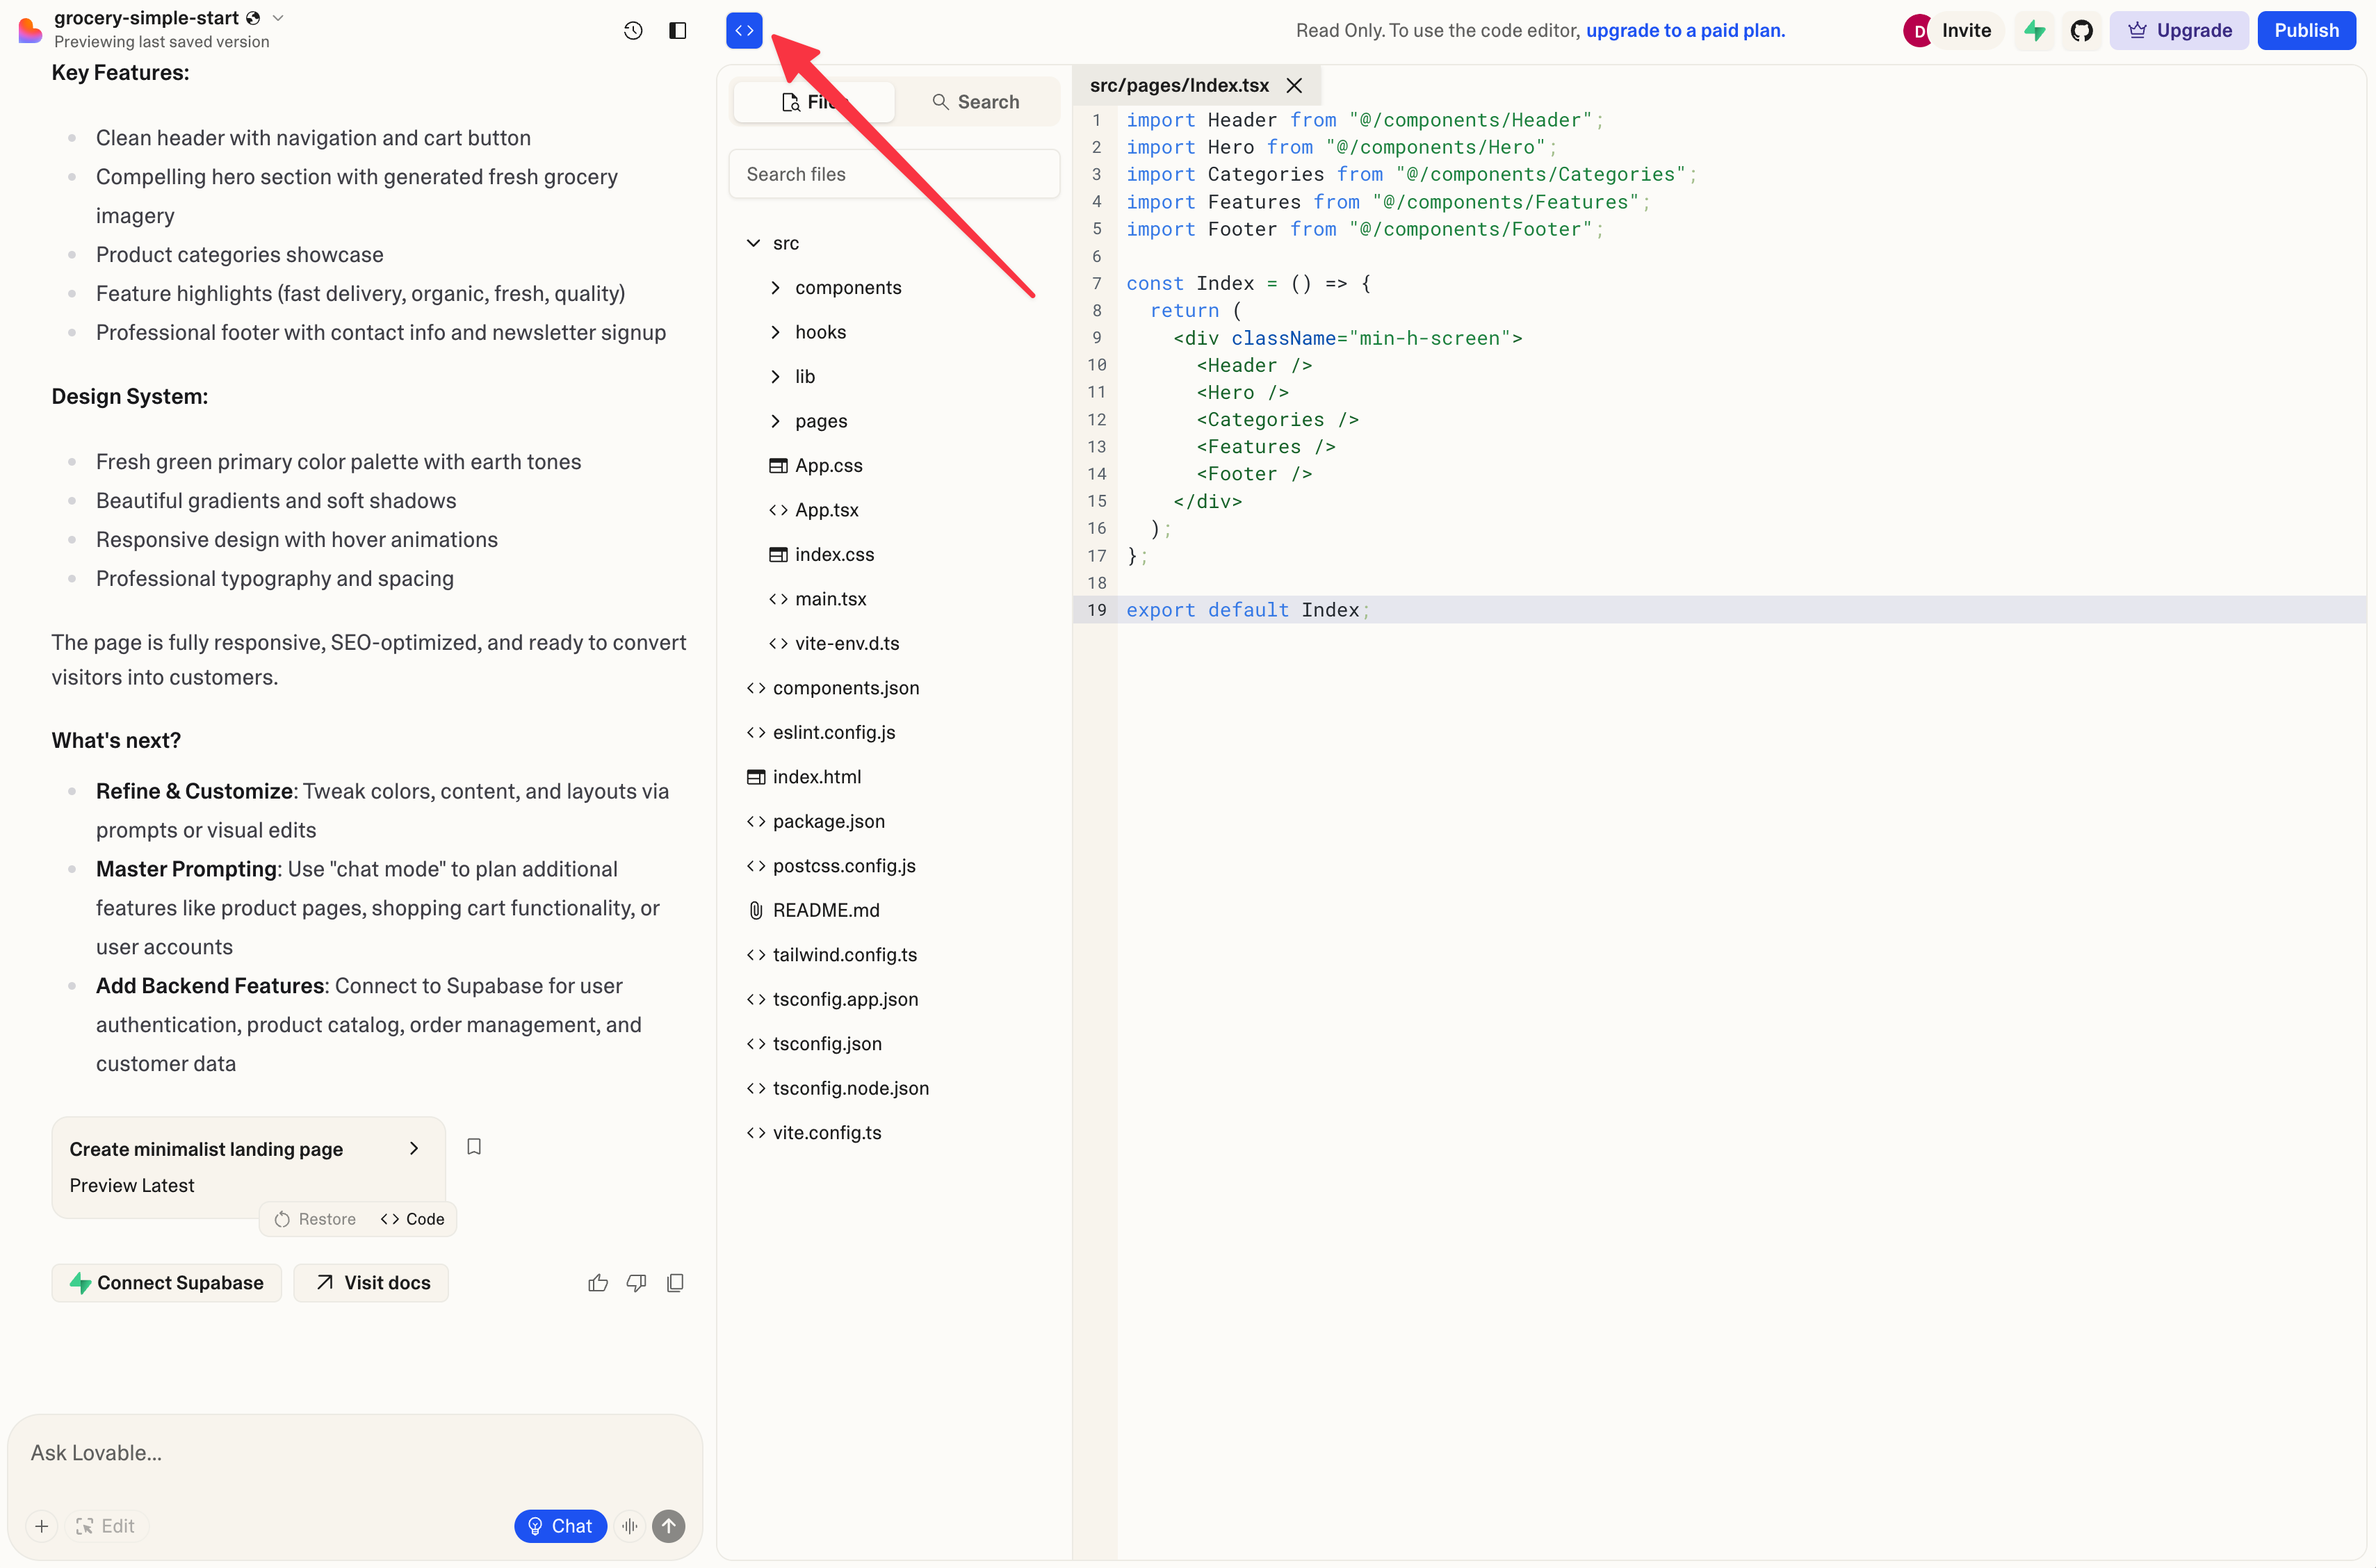
This is a relatively new feature in Lovable.
However, unlike the similar feature in V0, Bolt, and Magic Patterns, Lovable’s View Code mode is read-only. You can edit the code only after upgrading to a paid plan.
I don’t like this limitation because, in other similar tools, editing code doesn’t consume tokens. For example, even if you hit the daily token cap, you can still edit the code, (including asking ChatGPT, Claude, or Gemini to help revise it) and the updates will still render in the preview window.
6. Publish
This is a common feature across many AI prototyping tools.
If you click “Publish” in the top navigation bar, the process will take about a minute and generate a public sharing link that you can share with others.
As you can see, they’ve made app deployment as easy as a single click.
You can continue iterating on your website and click “Update” in the “Publish” dropdown to publish your changes.
Lastly, after publishing, you can un-publish your project anytime from the project settings.
Note: If you’re on Lovable’s Pro plan, you can also use your own custom domain name. That said, you don’t have to host your app on Lovable. You can always push the code to GitHub and deploy it through services like Vercel or Netlify, which is the more standard deployment approach.
Bonus Tip: Once you publish the project, you can use tools like html-to-design to convert the web page to Figma for further editing if you need to.
7. Github
There’s a GitHub icon in the top navigation bar.
The advantage of connecting to GitHub is that it allows you to store all your code outside of Lovable.
This is especially helpful when you want to take the project more seriously, offering the following benefits:
Your team can access and collaborate on the code.
You can better track and manage versions.
You can continue building the project using AI development tools such as Cursor or Claude Code.
I wrote an article about how the Lovable—Github—Cursor workflow works.
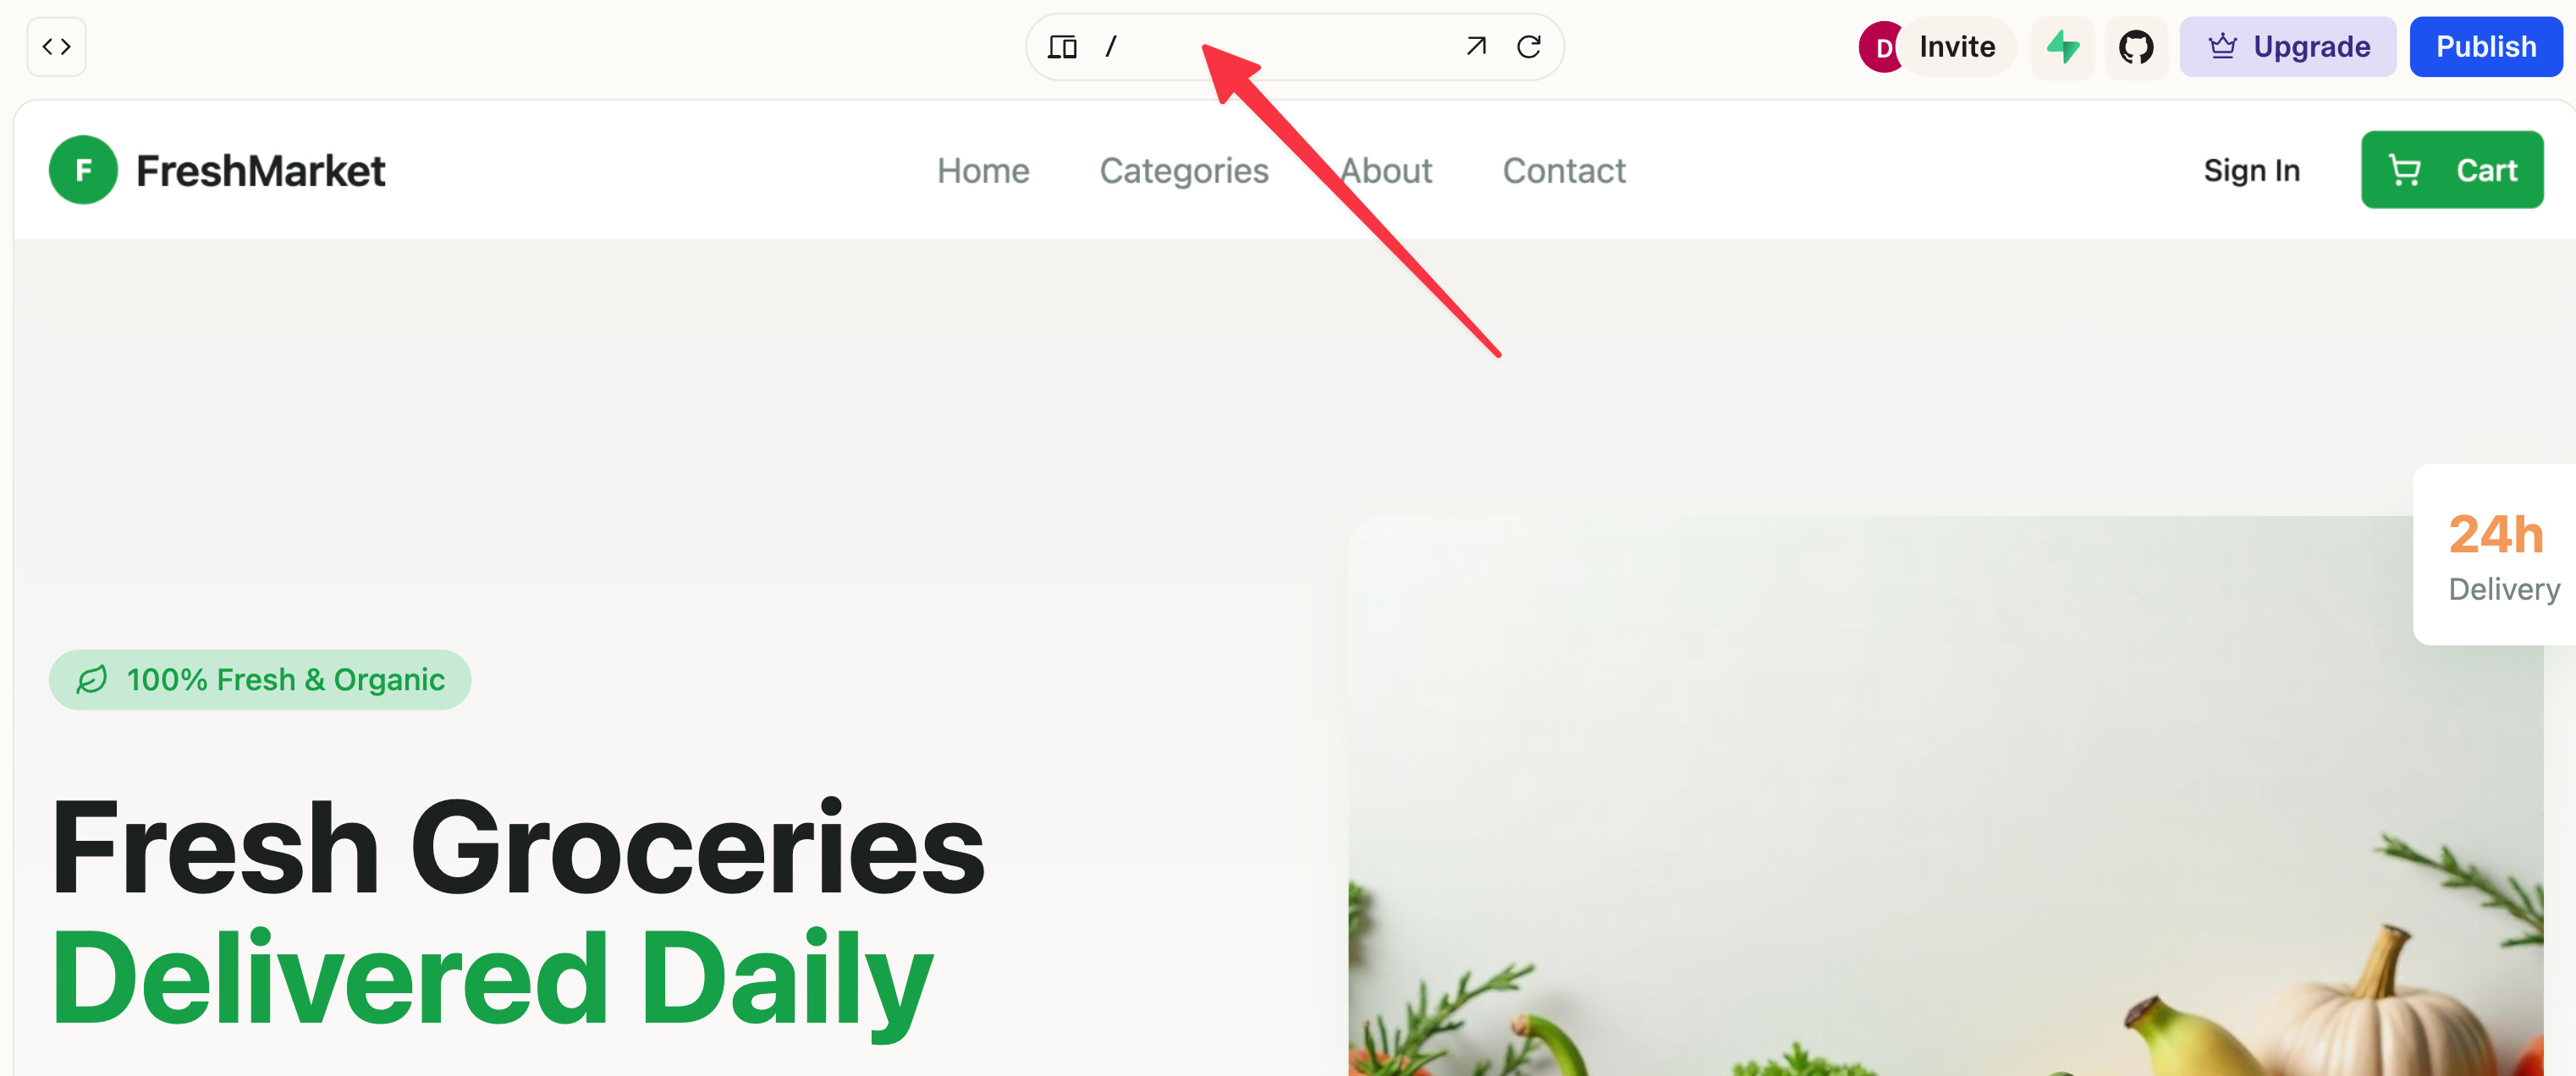
8. Page Navigation
If you have more than one page in your Lovable prototype, then click here can help you select the page you want to be on.
9. Supabase
There is a Supabase icon in the top navigation bar.
It is only helpful when you want to connect your frontend to a backend database.
Here is a helpful page from Lovable’s official website on Supabase integration.
The Advanced Features
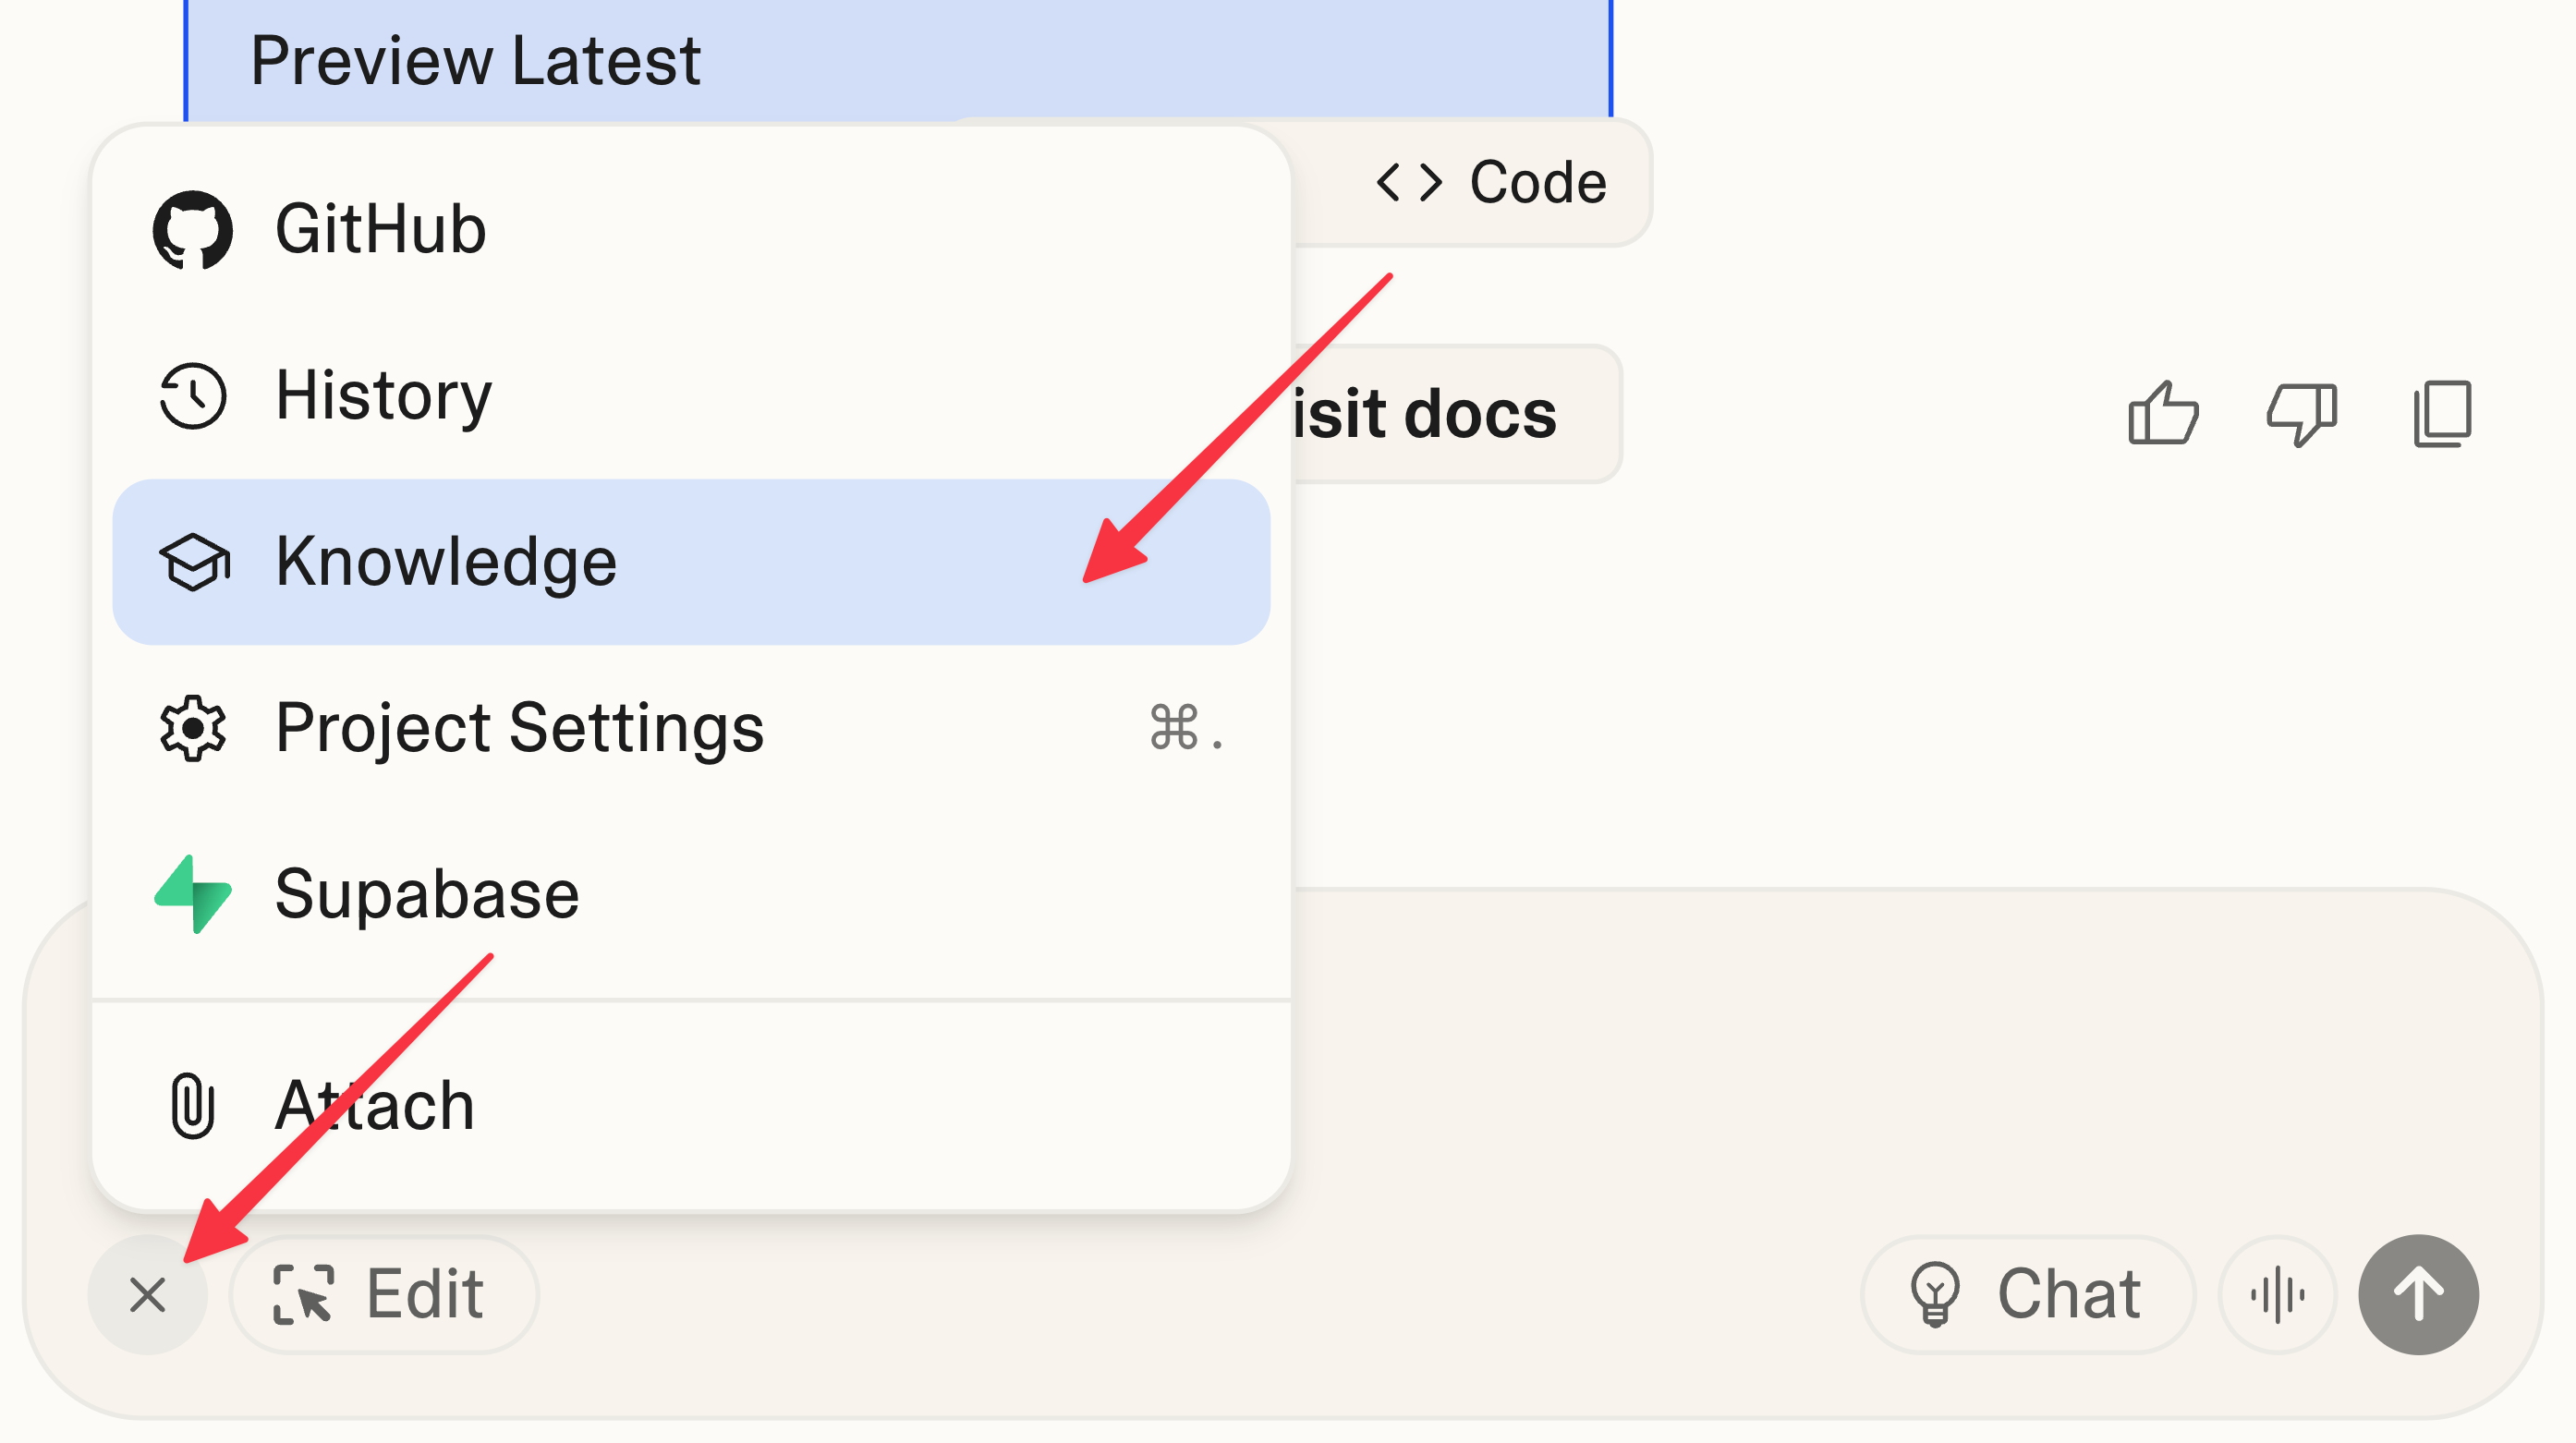
10. Knowledge
If you click the “+” icon in the prompt window, you’ll access the “Knowledge” panel.
It is the knowledge base or project rule file that the project needs to follow.
I really like this because this is similar with the .md file that development tools like Cursor or Claude Code often uses. It can give specific instruction and context for Lovable.
V0 and Bolt don’t have this feature yet.
That said, there are two downsides of this feature in Lovable:
It is not available on the homepage, which means that you have to run your first prompt, then you’ll able to see the “+” icon and create a “Knowledge”, then ask Lovable to rerun based on it.
It can consume a lot of tokens. If you’re on a free plan, you may hit your daily usage cap soon after adding the “Knowledge.”
11. Community Projects
There are many Lovable projects shared by other builders here: https://lovable.dev/projects/featured.
You can “Remix” from there. In other words, if you select a project. you can duplicate it (even including its “Knowledge”) and build from there.
You can see the full code of those projects too.
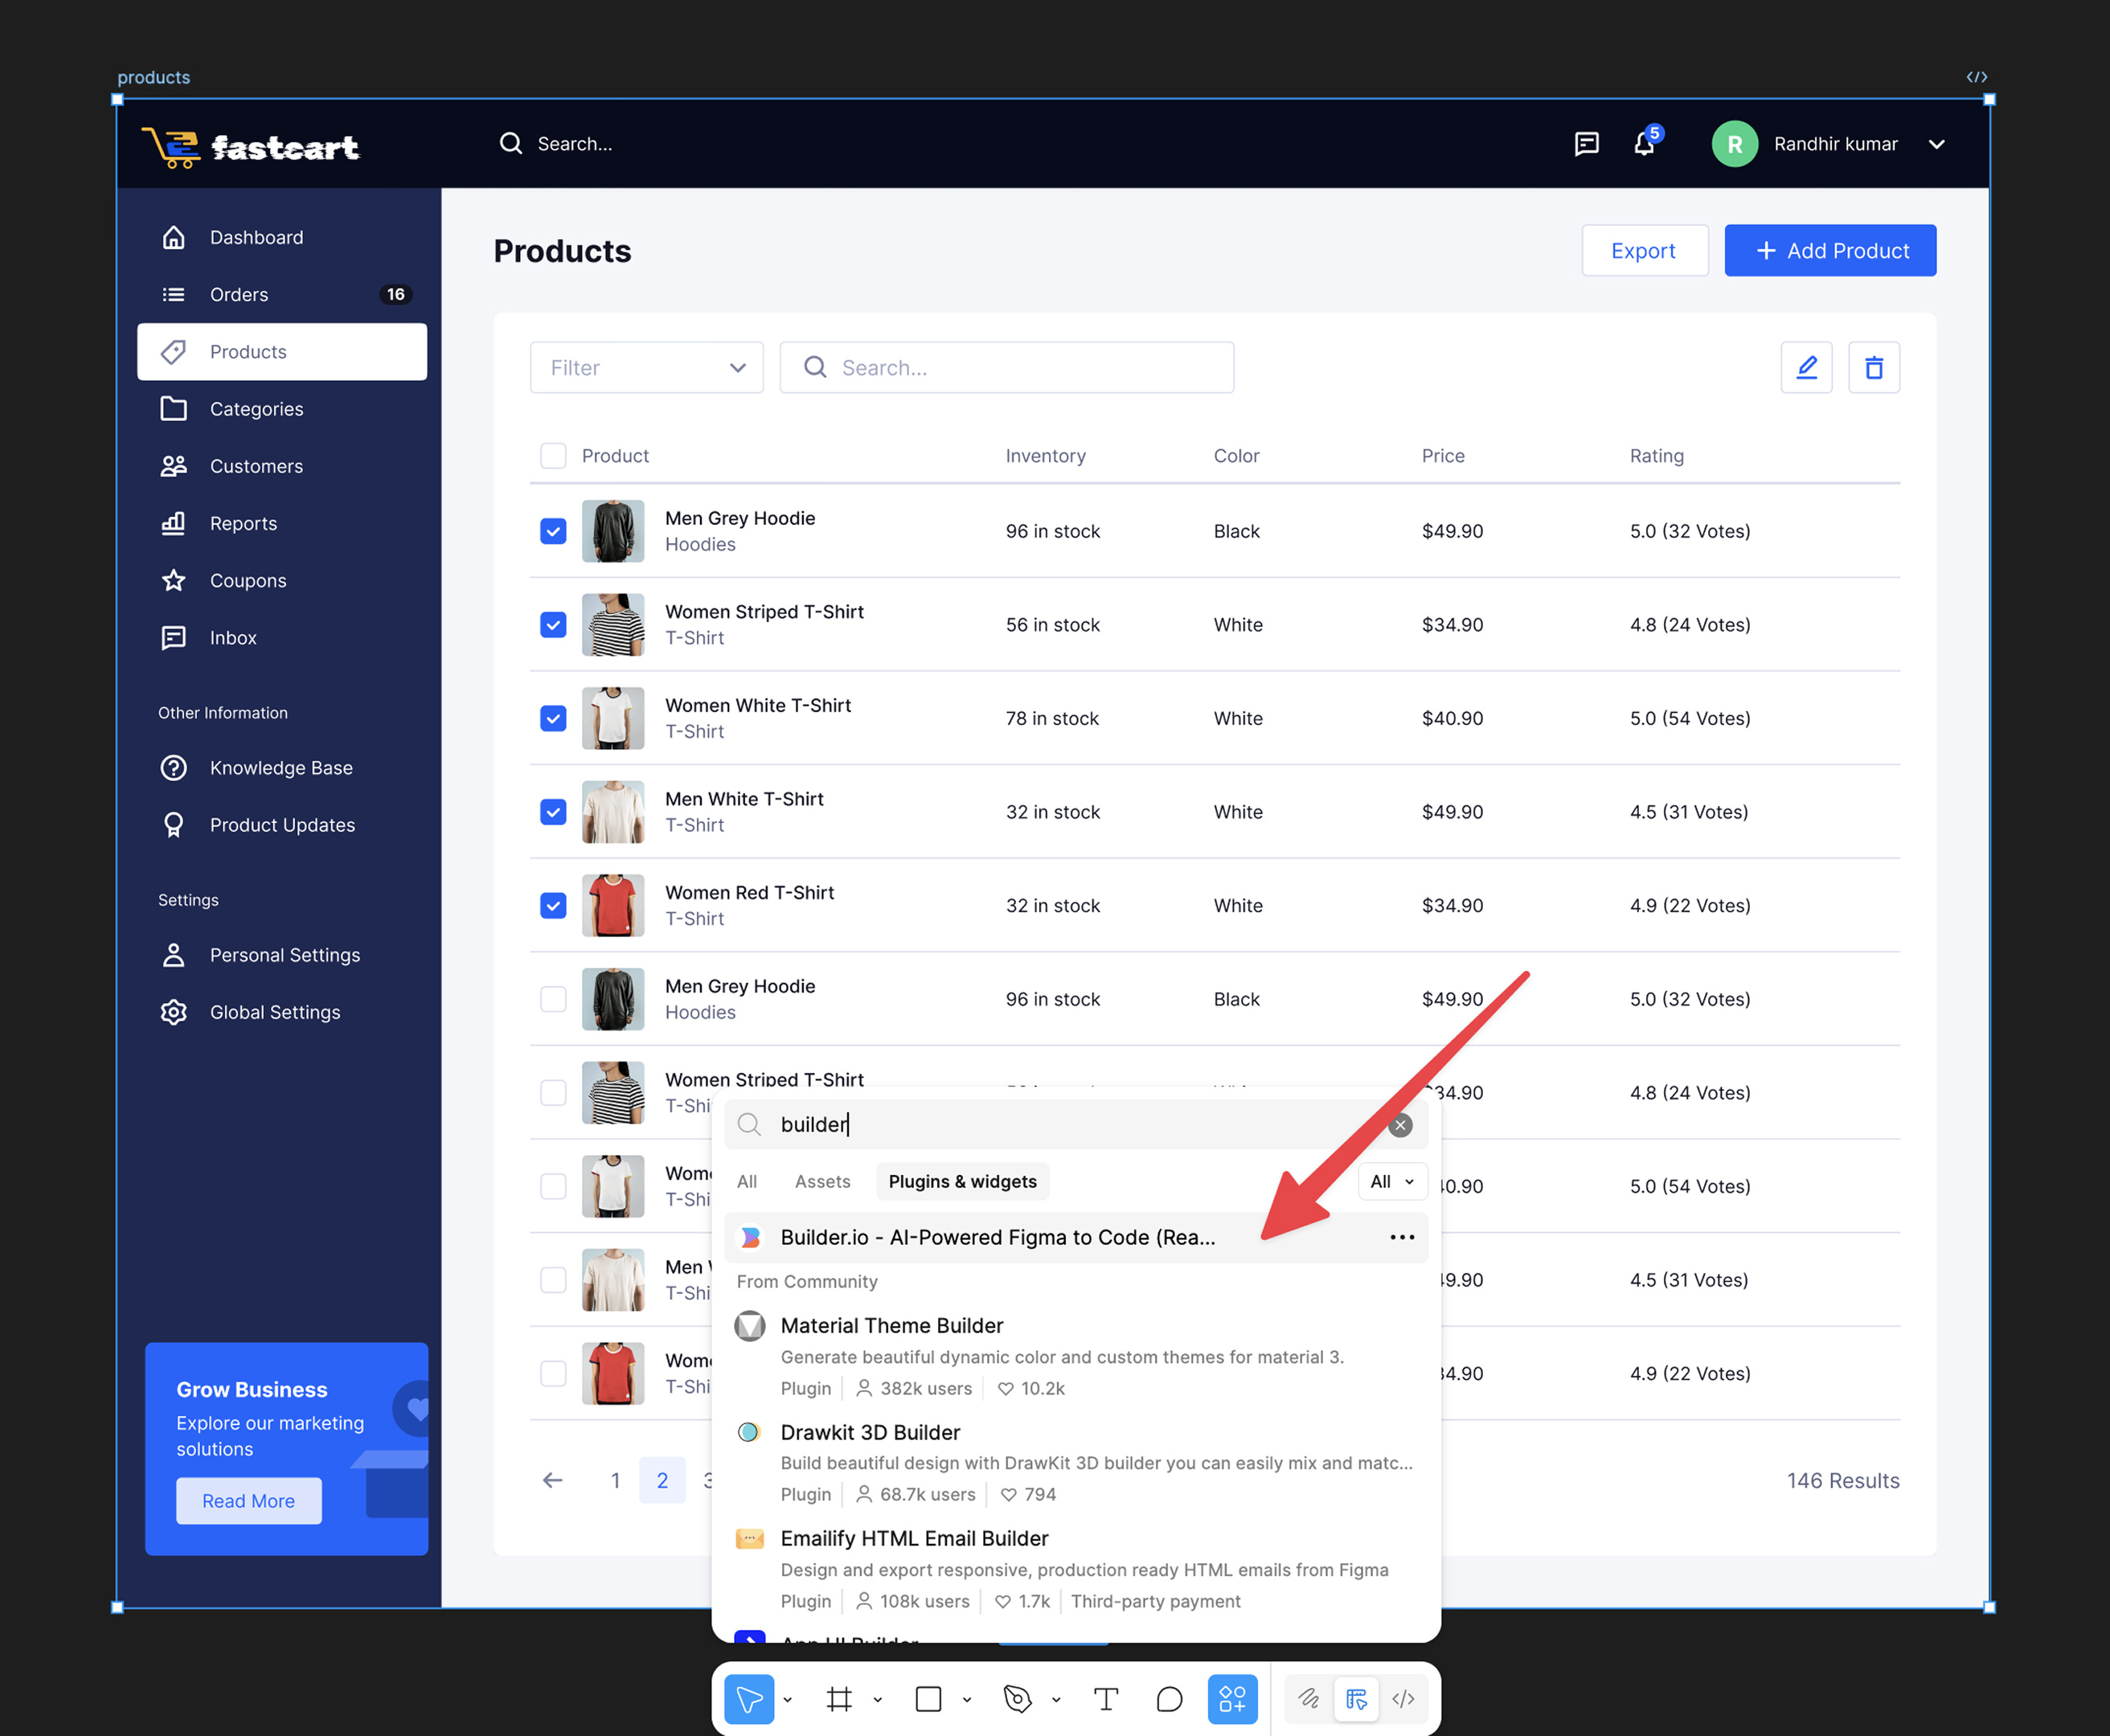
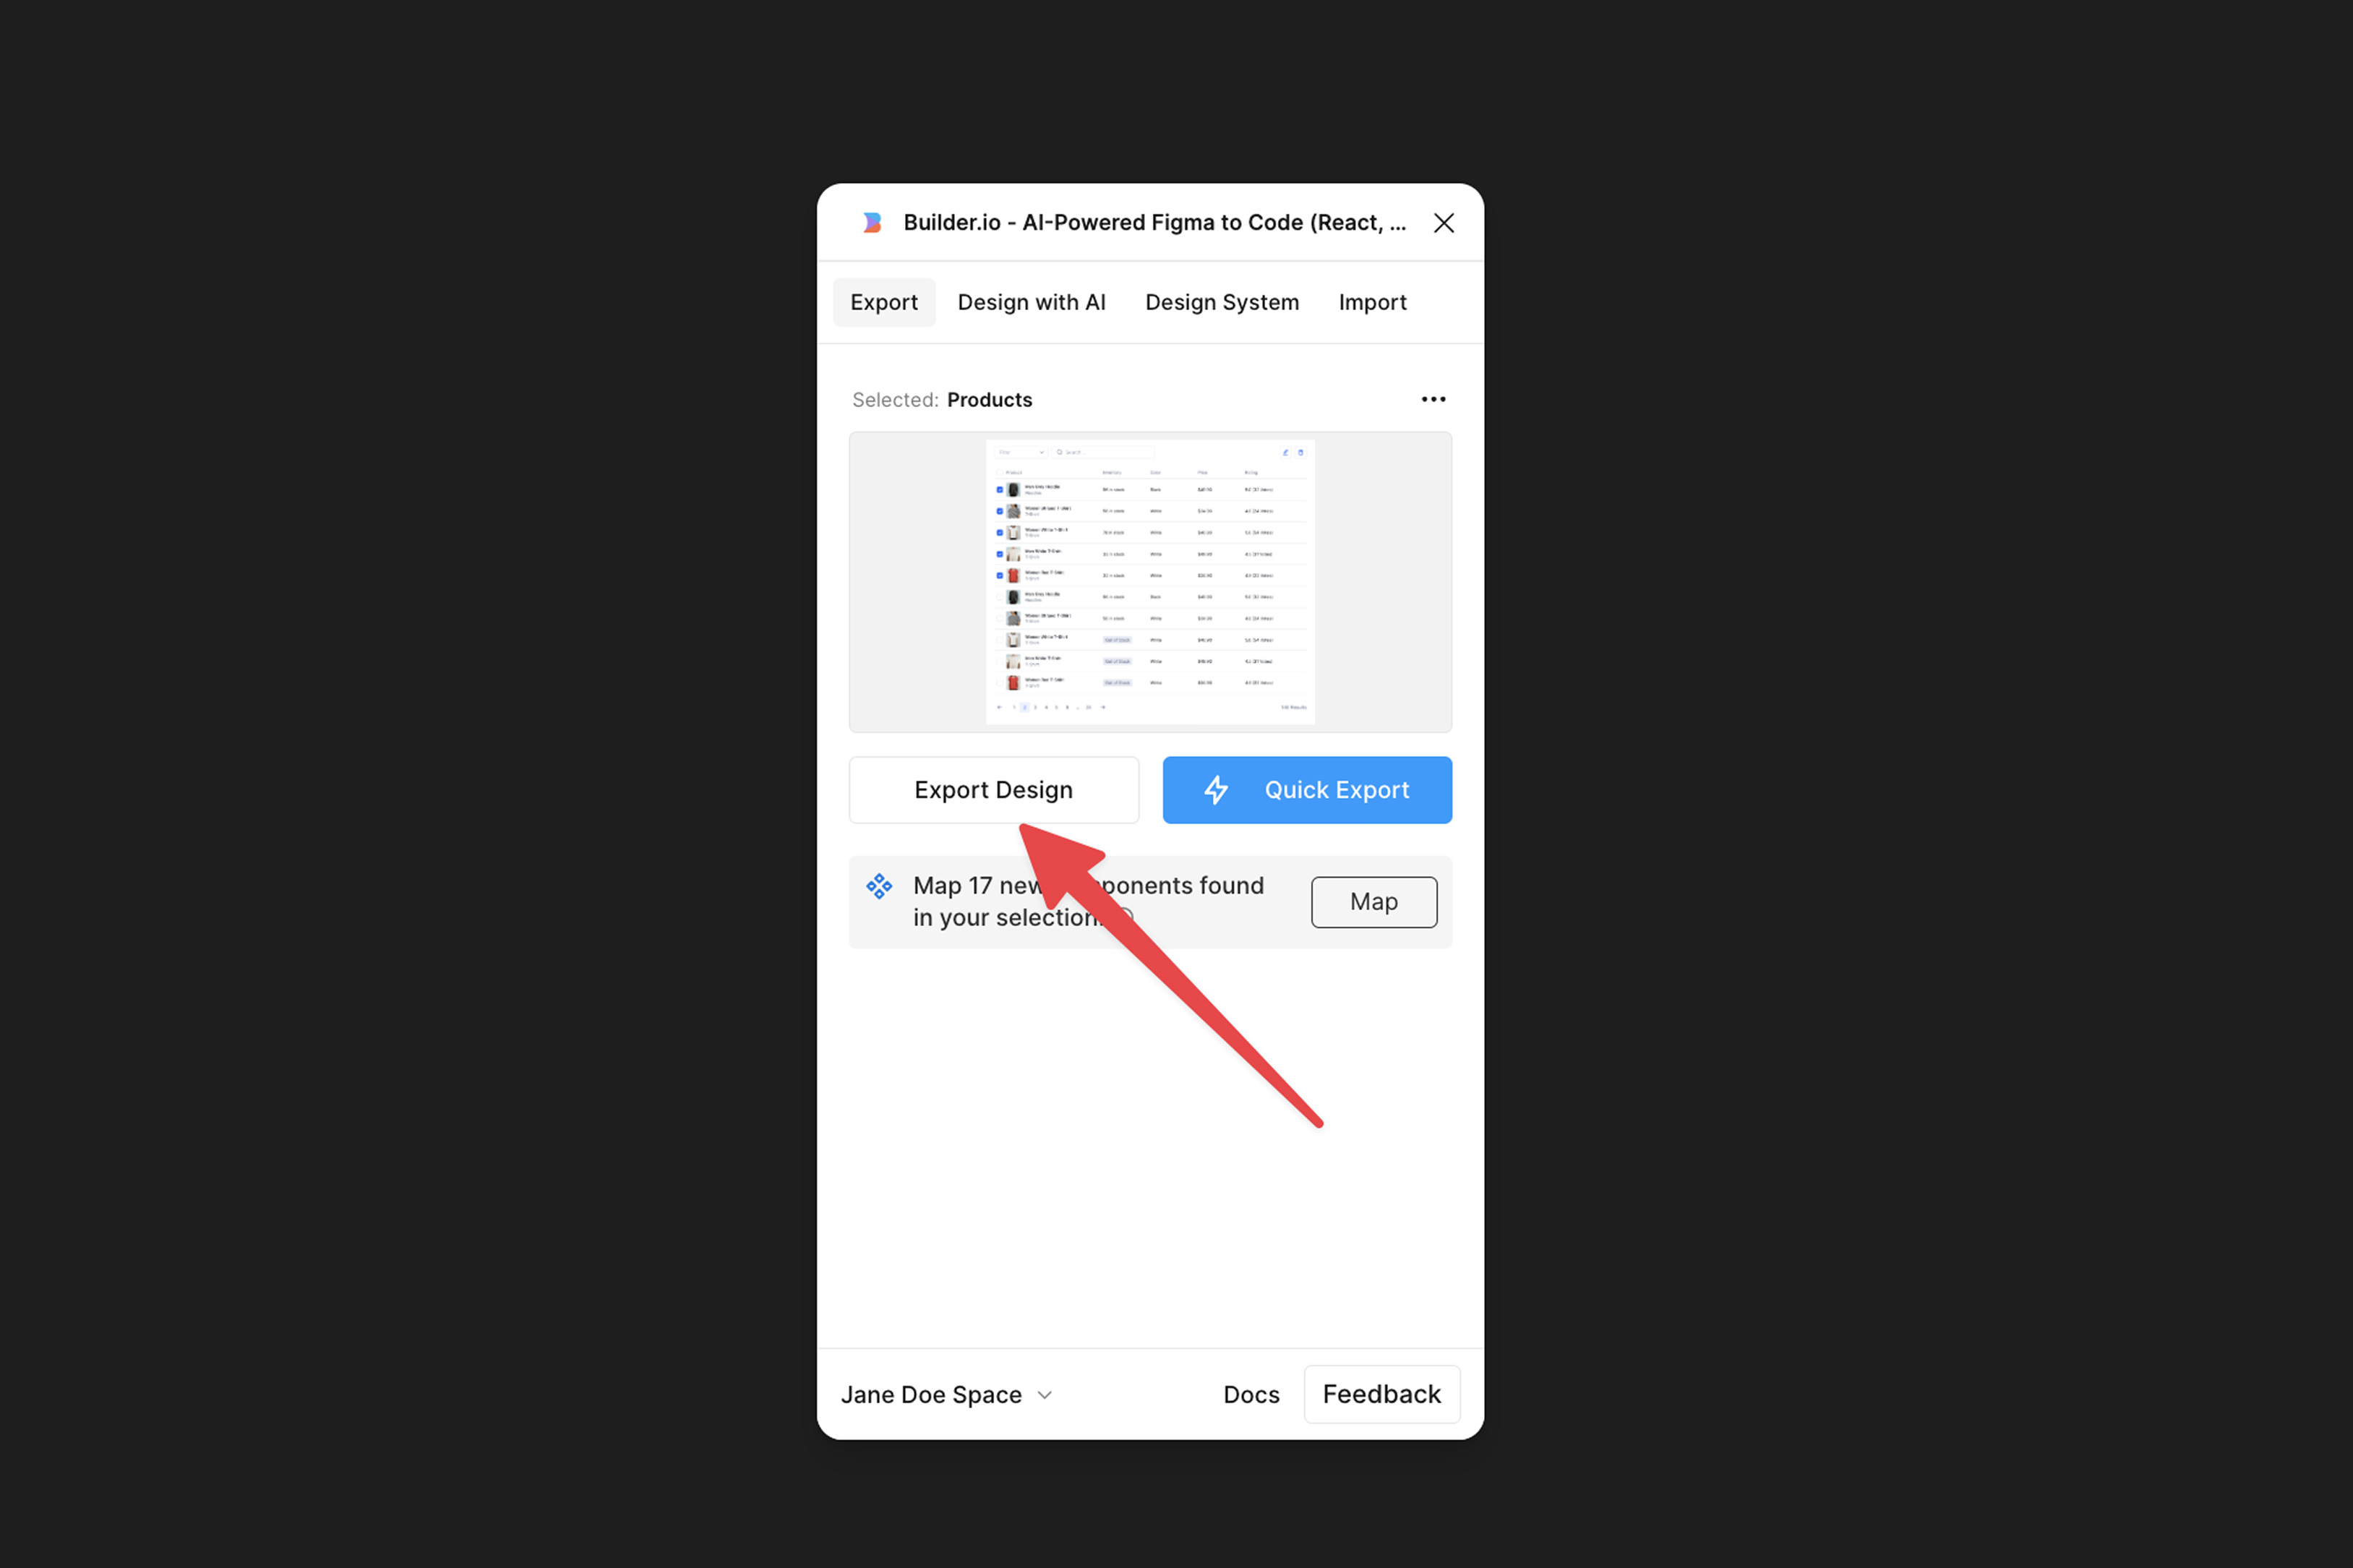
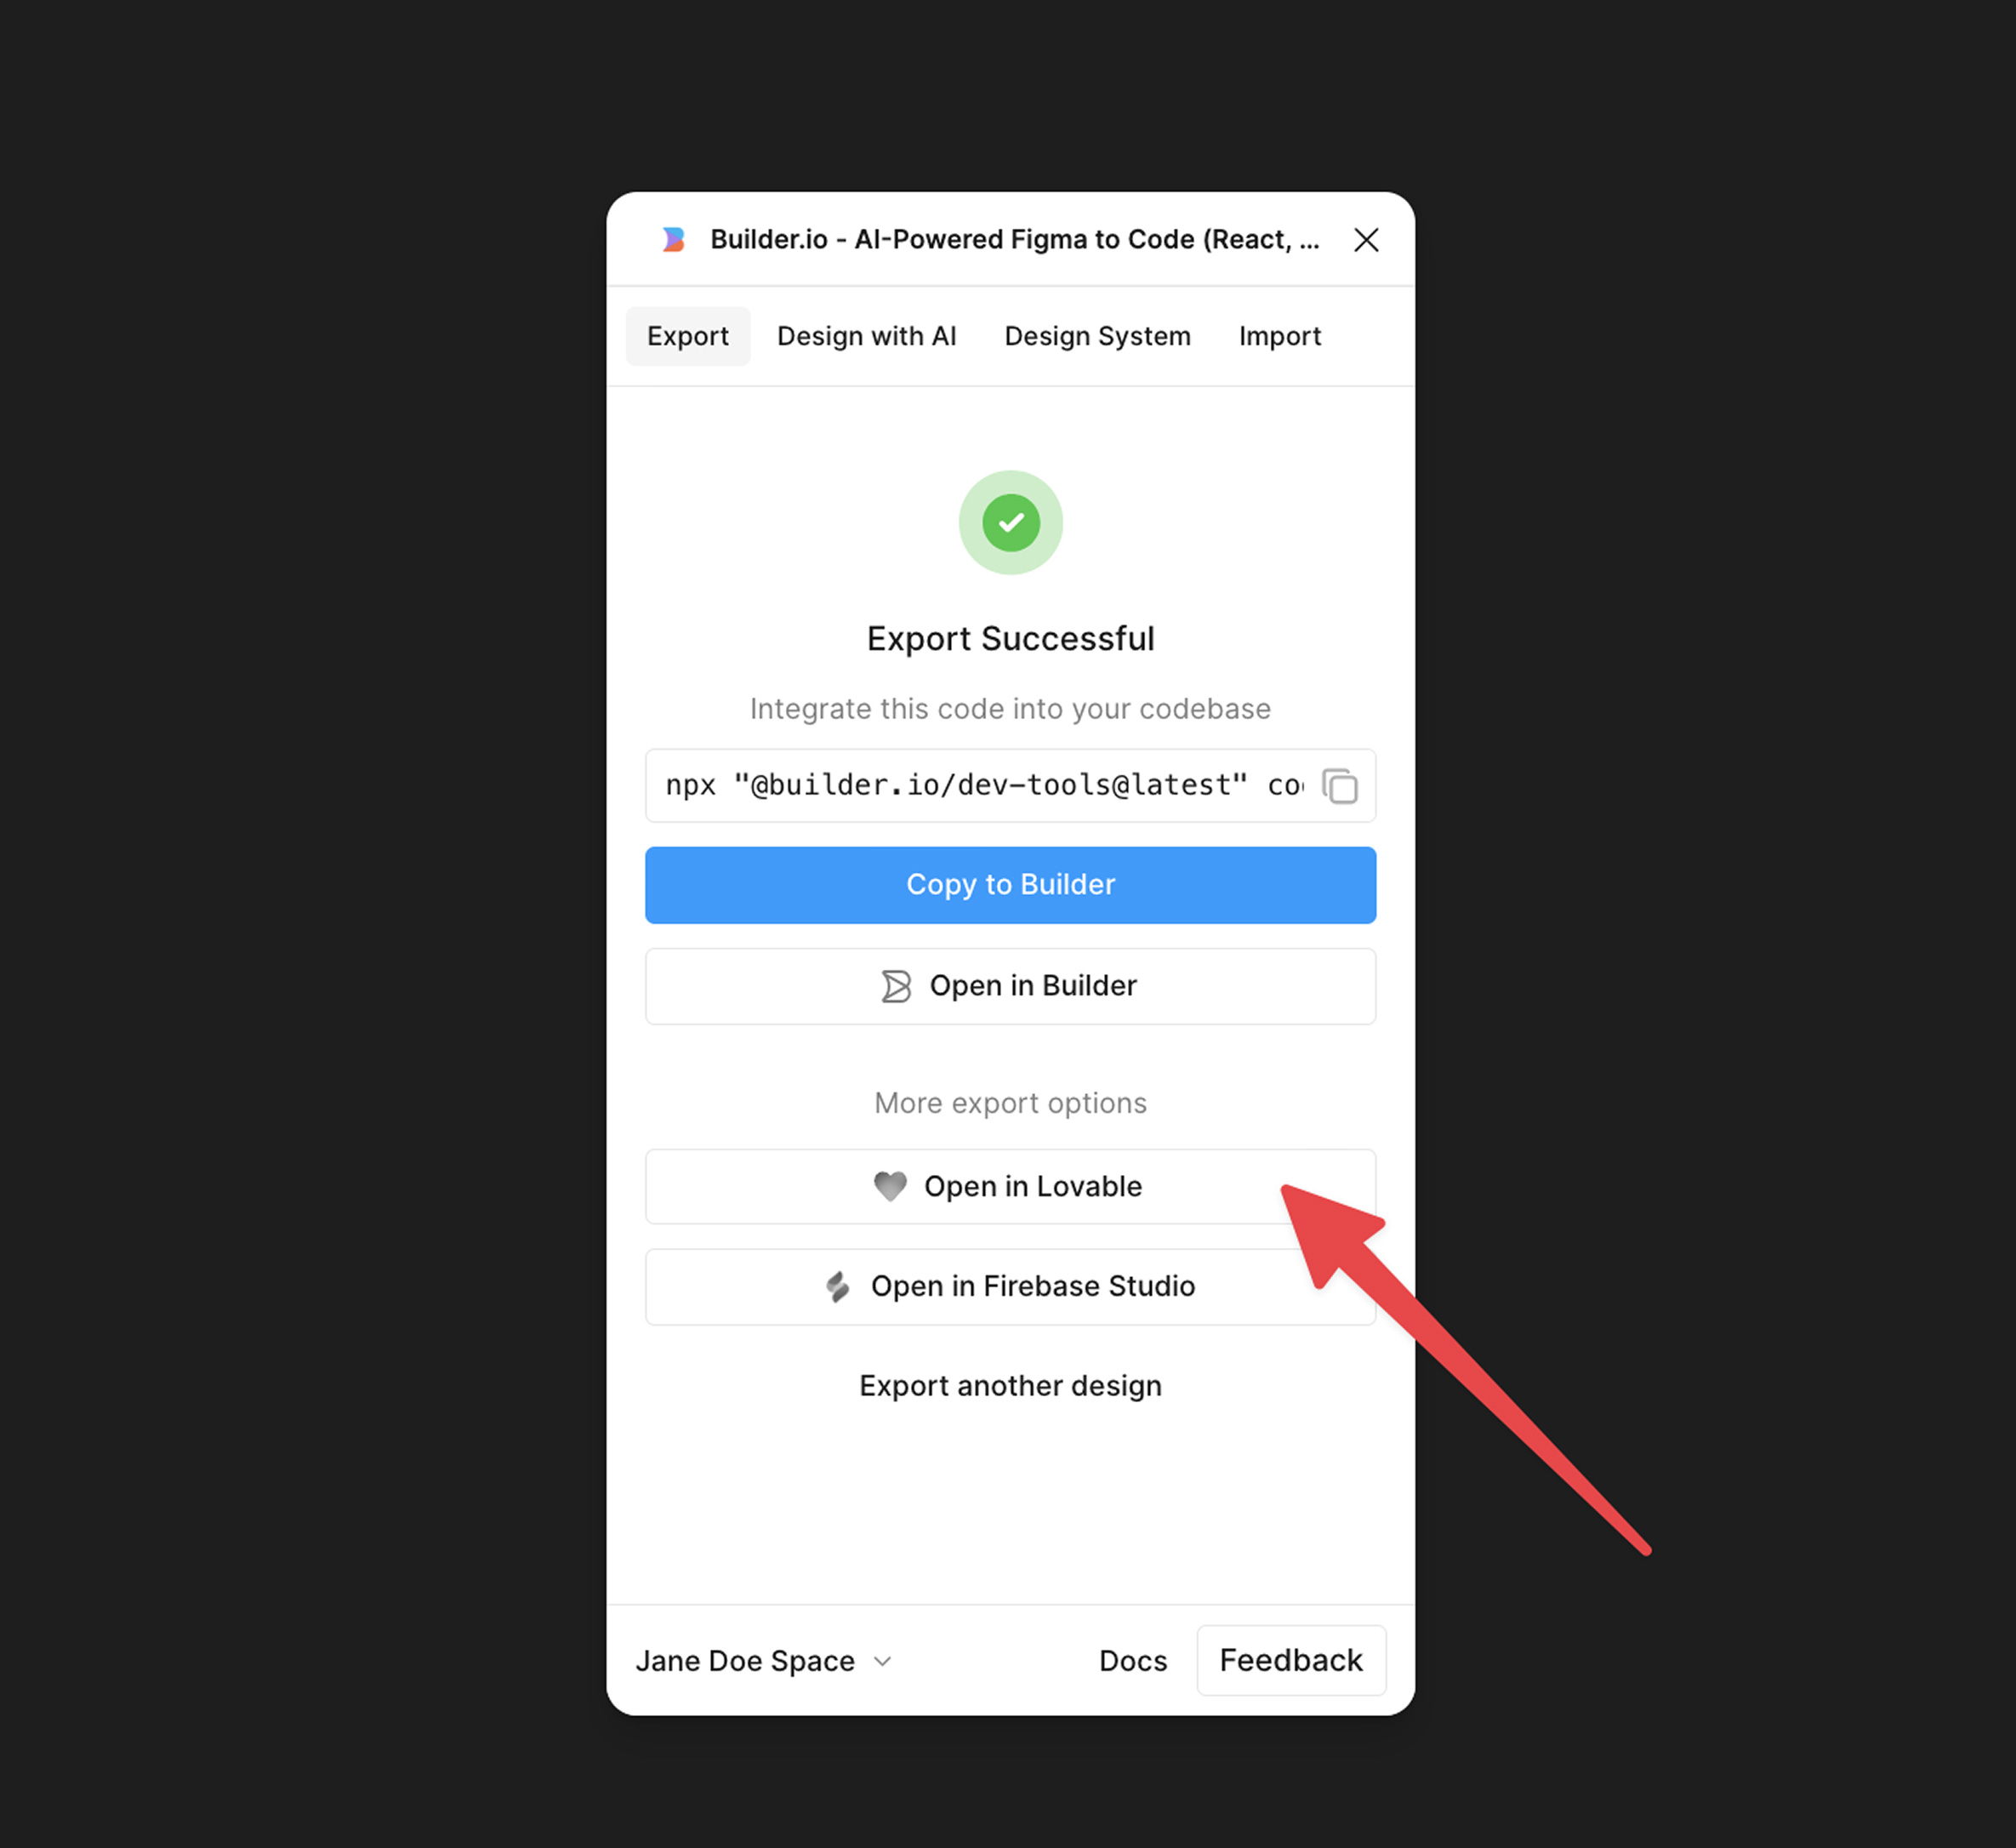
12. Import from Figma
Unlike V0, Lovable does not have a built-in feature to import a design from Figma.
That said, it partners with a 3rd-party tool called Builder.io.
You can import a design from Figma to Lovable via Builder.io’s Figma plugin.
13. Connect with an AI model
Lovable AI is a new feature in Lovable, launched along with Lovable Cloud.
You may remember this article I wrote last month, where I shared how to build a simple AI-powered app in Cursor. During that walkthrough, I still had to get an API key from OpenAI and configure it in Cursor.
Lovable makes it even easier to connect with an AI model, using Gemini 2.5 Flash by default.
That convenience, like some other integrated features in Lovable, can come at an extra cost though. Try it out and let me know what you think.
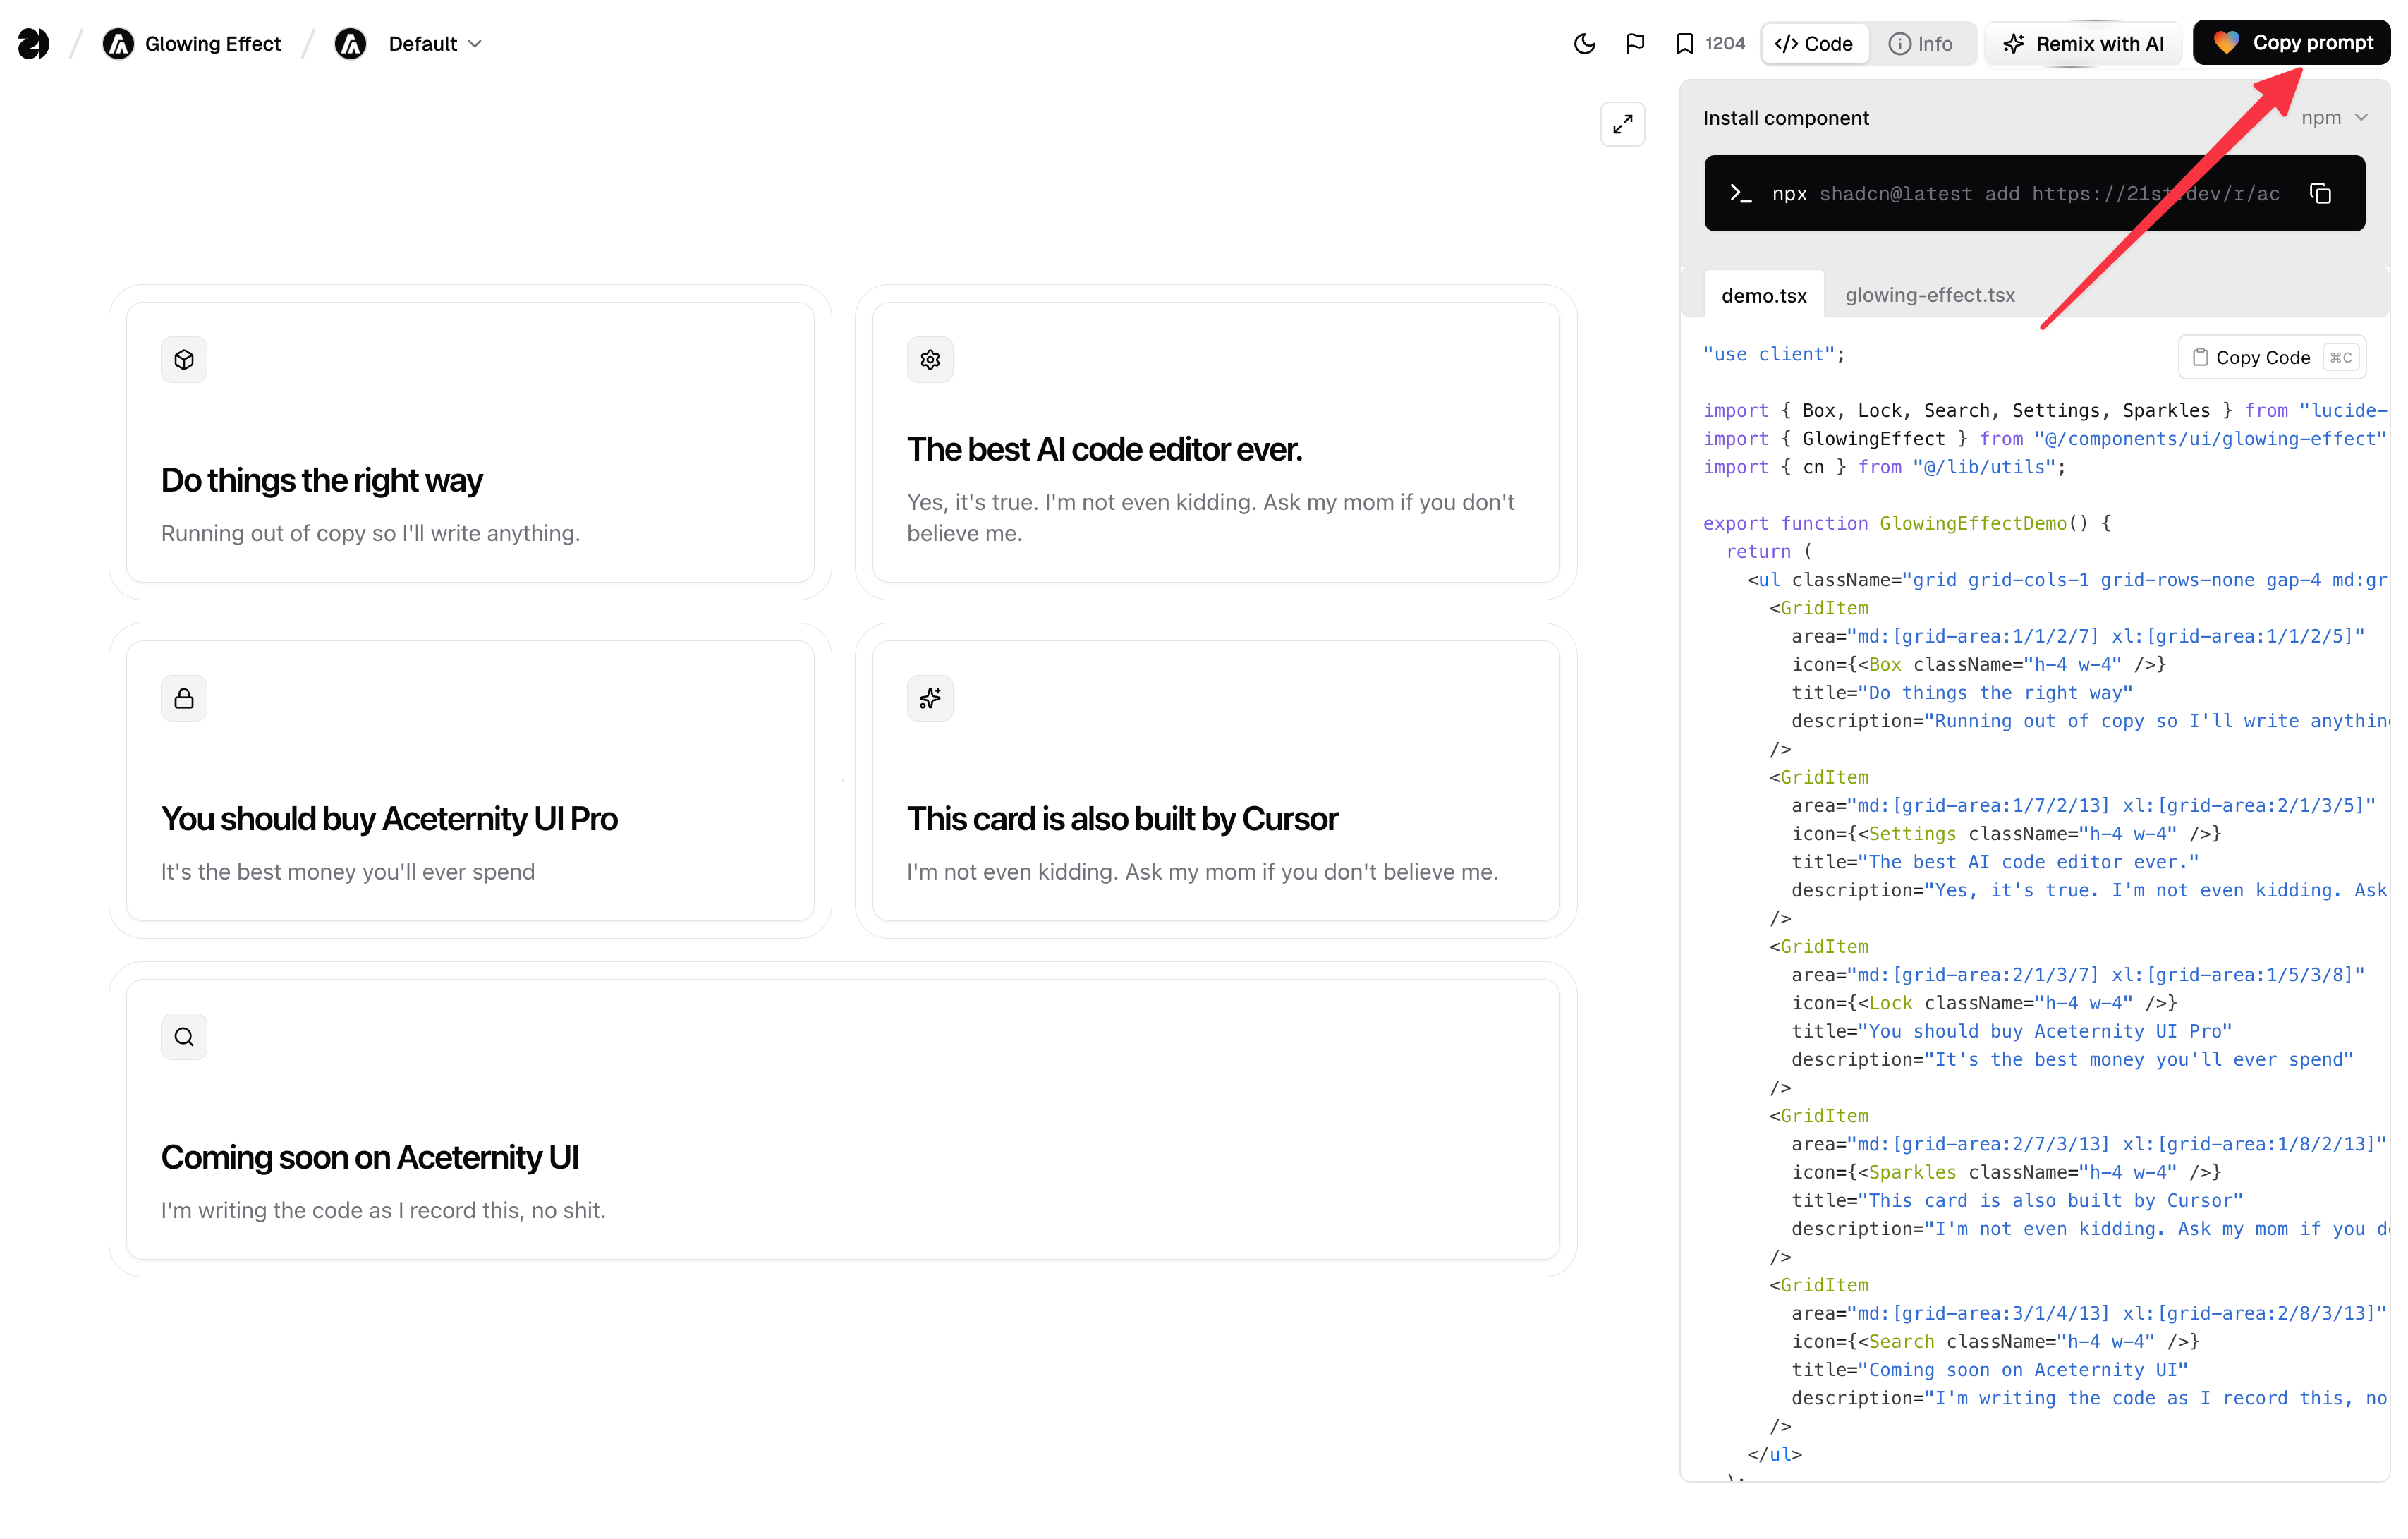
Extra Tips
Websites like 21st.dev allows you to select a component that you like and “copy the prompt” in Lovable.
In addition, you don’t have to limit yourself to one tool. You can try the same prompt in other tools like V0, take inspiration from one, and remix it in another. A student from my course did that, and I thought it was brilliant.
Thanks for reading.
Until next time,
Xinran
-
P.S. Published a free lesson on Oct 29, 11AM ET to talk about different ways to “vibe designing with AI”.
P.P.S. The past two months have felt like a whirlwind, filled with fatigue, anxiety, recovery, and deep reflection on life. I’ve read about 20 books, both fiction and non-fiction, as a way to step away from my computer, slow down, and recharge. It’s been a messy period, mixed with quiet joy when my 3-year-old kissed me on the cheek.
Lovable has been one of my favorite tools to work with. Thanks for sharing!
Would love to try! Your crash course from V.0 i once tried and it's very comprehensive!! Easy to follow